Description of the Adminer tool
The Adminer Tool allows to manage databases via a web interface and so represents an alternative to the PhpMyAdmin tool. The databases or more precisely the DBMS systems which can be managed and administered via Adminer, include in particular MySQL, PostgreSQL, SQLite, MS SQL, Oracle, etc. However, in the case of the TurnKey Linux images, it is primarily used for management of MySQL or PostgreSQL databases, which are pre-installed within TKL images. Nevertheless, it can be used for management of other databases. If there is neither MySQL nor PostgreSQL database pre-installed within a TKL image, the Adminer tool won’t be pre-installed there.

Adminer was written in the PHP language as a single source script. This is a significant difference to the more commonly used PhpMyAdmin, which Adminer outperforms particularly in the speed of data processing. Given the uncomplicated and intuitive interface, it is also suitable as a tool for the database management beginners. But even the professionals will not reject it. In fact, they often prefer it to PhpMyAdmin, and not only for its simplicity and velocity.
The Adminer tool was created by the Czech developer Jakub Vrána. The software is available free of charge for both commercial and non-commercial use (license Apache or GPL 2). There are many translations available, including Czech. There are also many alternative themes and plugins available for Adminer. The documentation of the Adminer tool is available at:
Use of the Adminer tool
1. We enter the address of our server into the address bar of the web browser: https://IP.address.ofour.server:12322 (it’s necessary to use https because the Adminer uses the SSL protocol; replace IP.address.ofour.server with the real address of your server; the 12322 port is the port to which Adminer listens to)
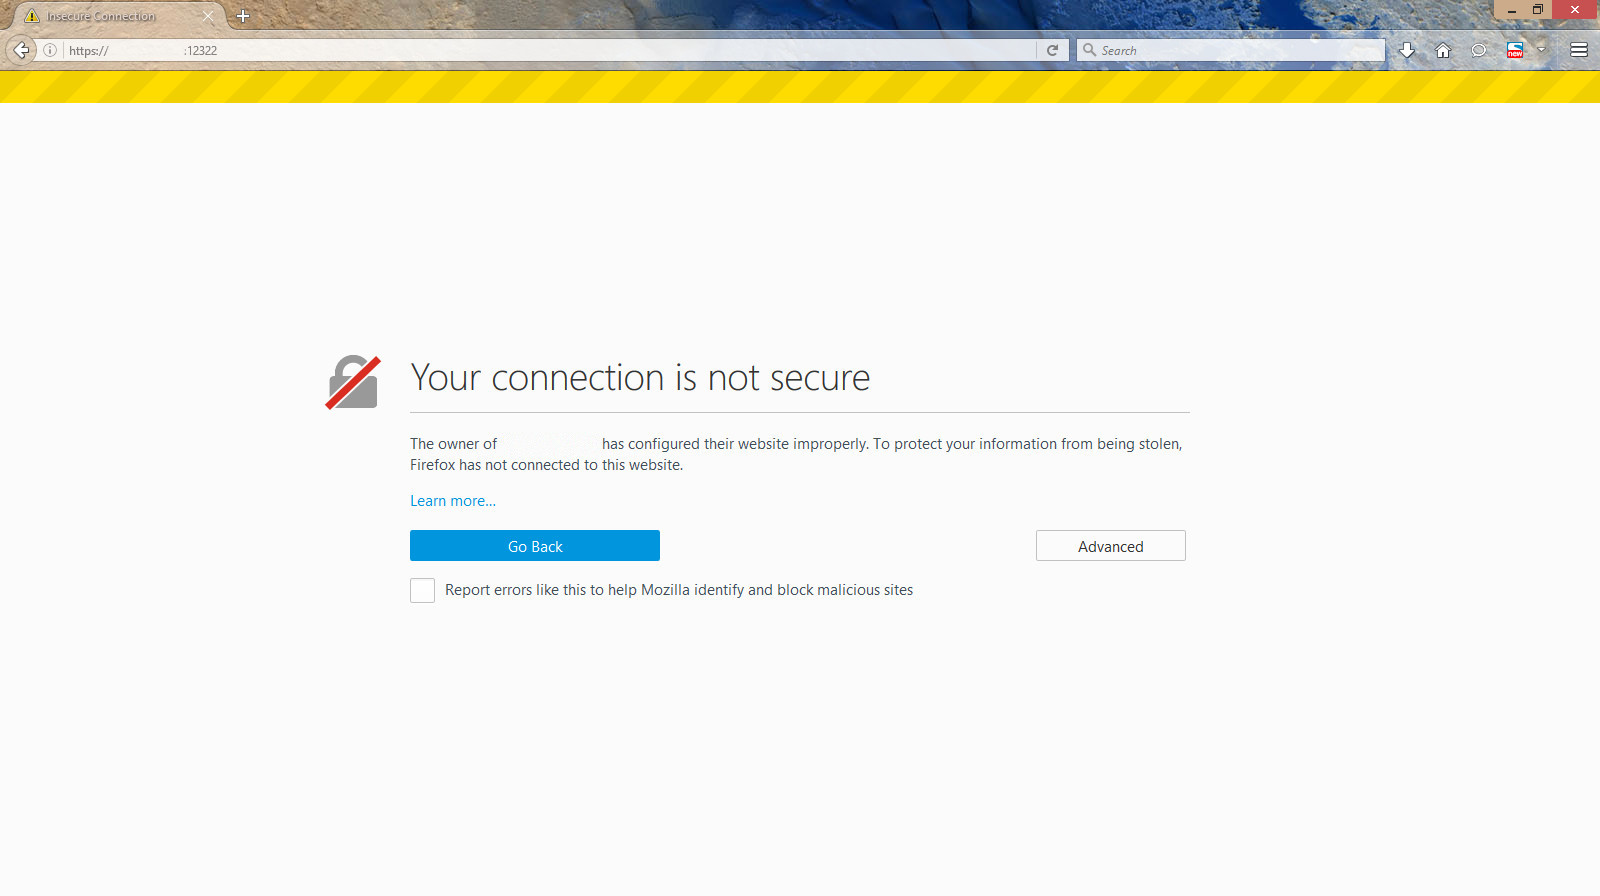
2. The communication is encrypted via a certificate generated by the server. Therefore we choose the option „Advanced“
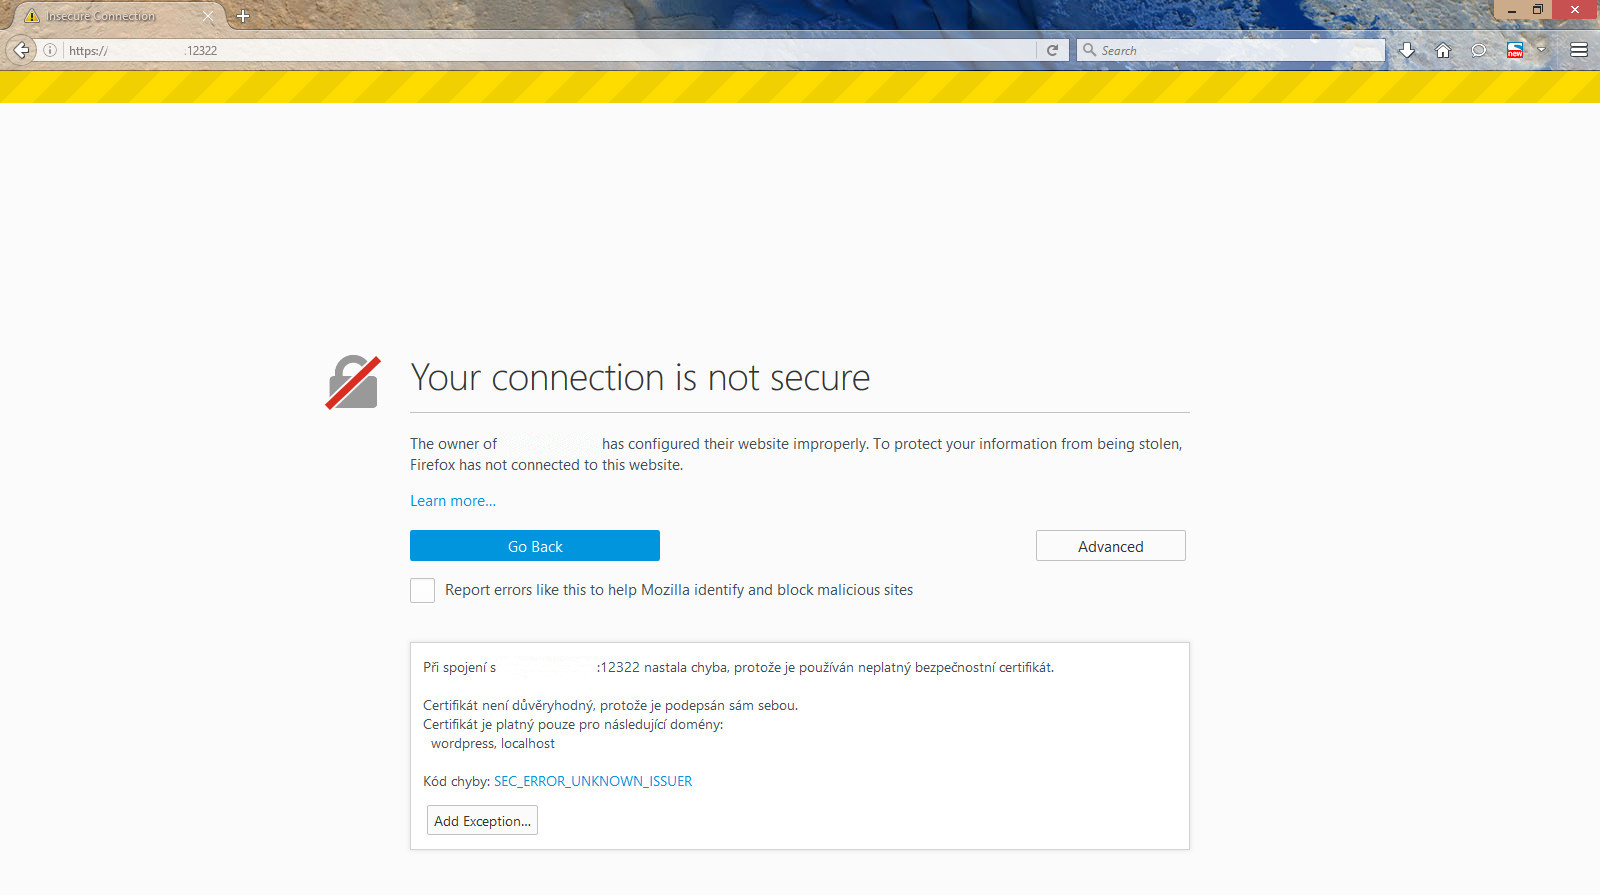
3. Next, we choose the „Add Exception…“ button
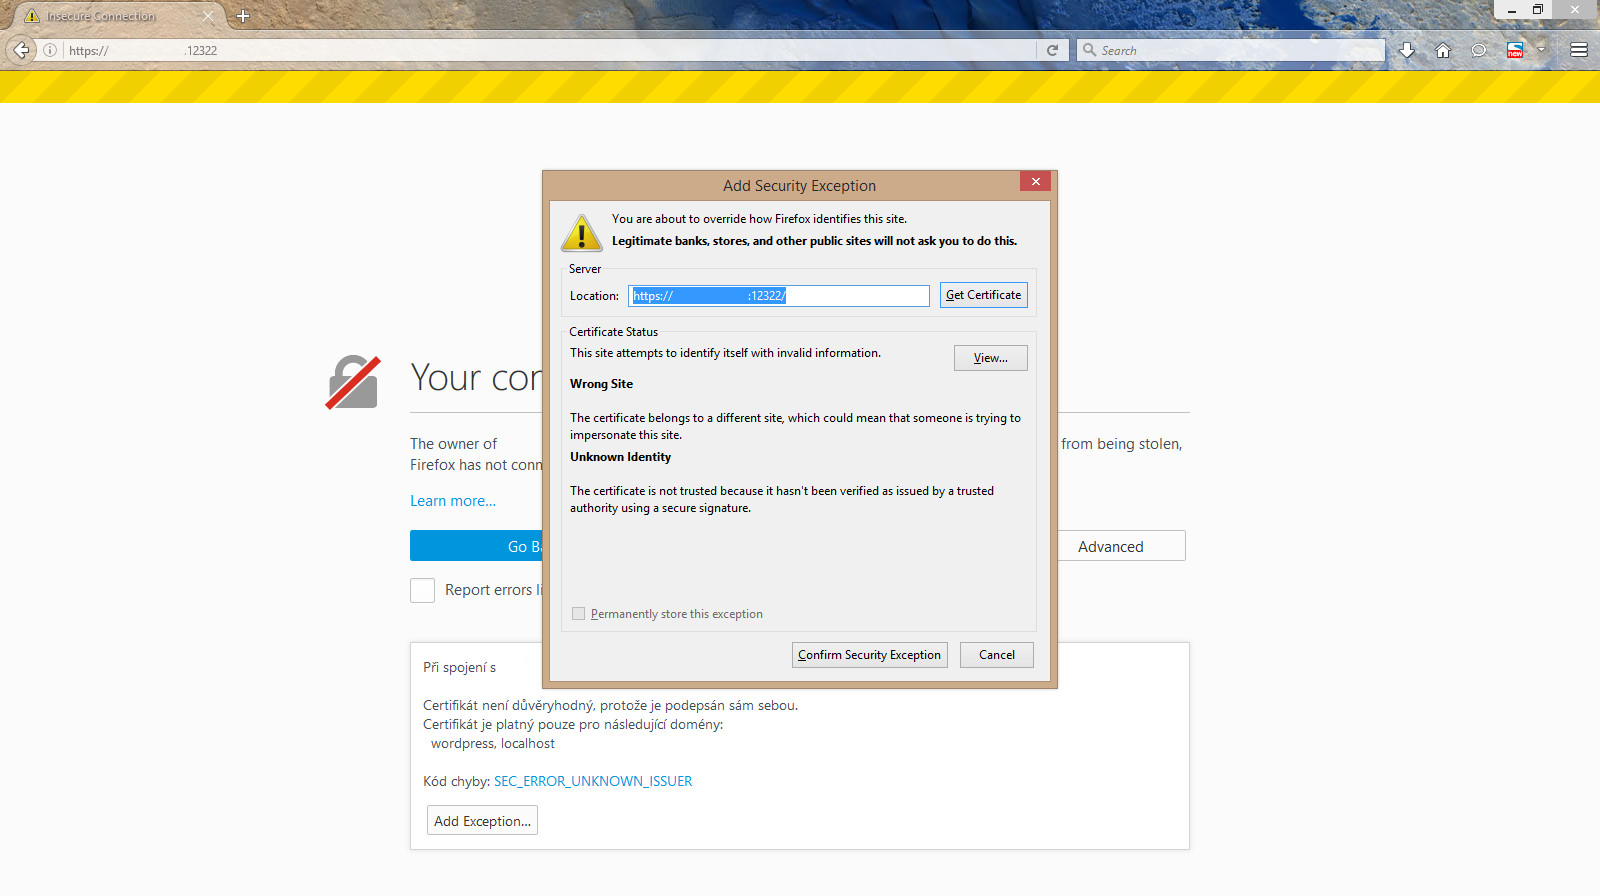
4. After hitting „Confirm Security Exception“ button, the login dialog of the Adminer tool will be shown
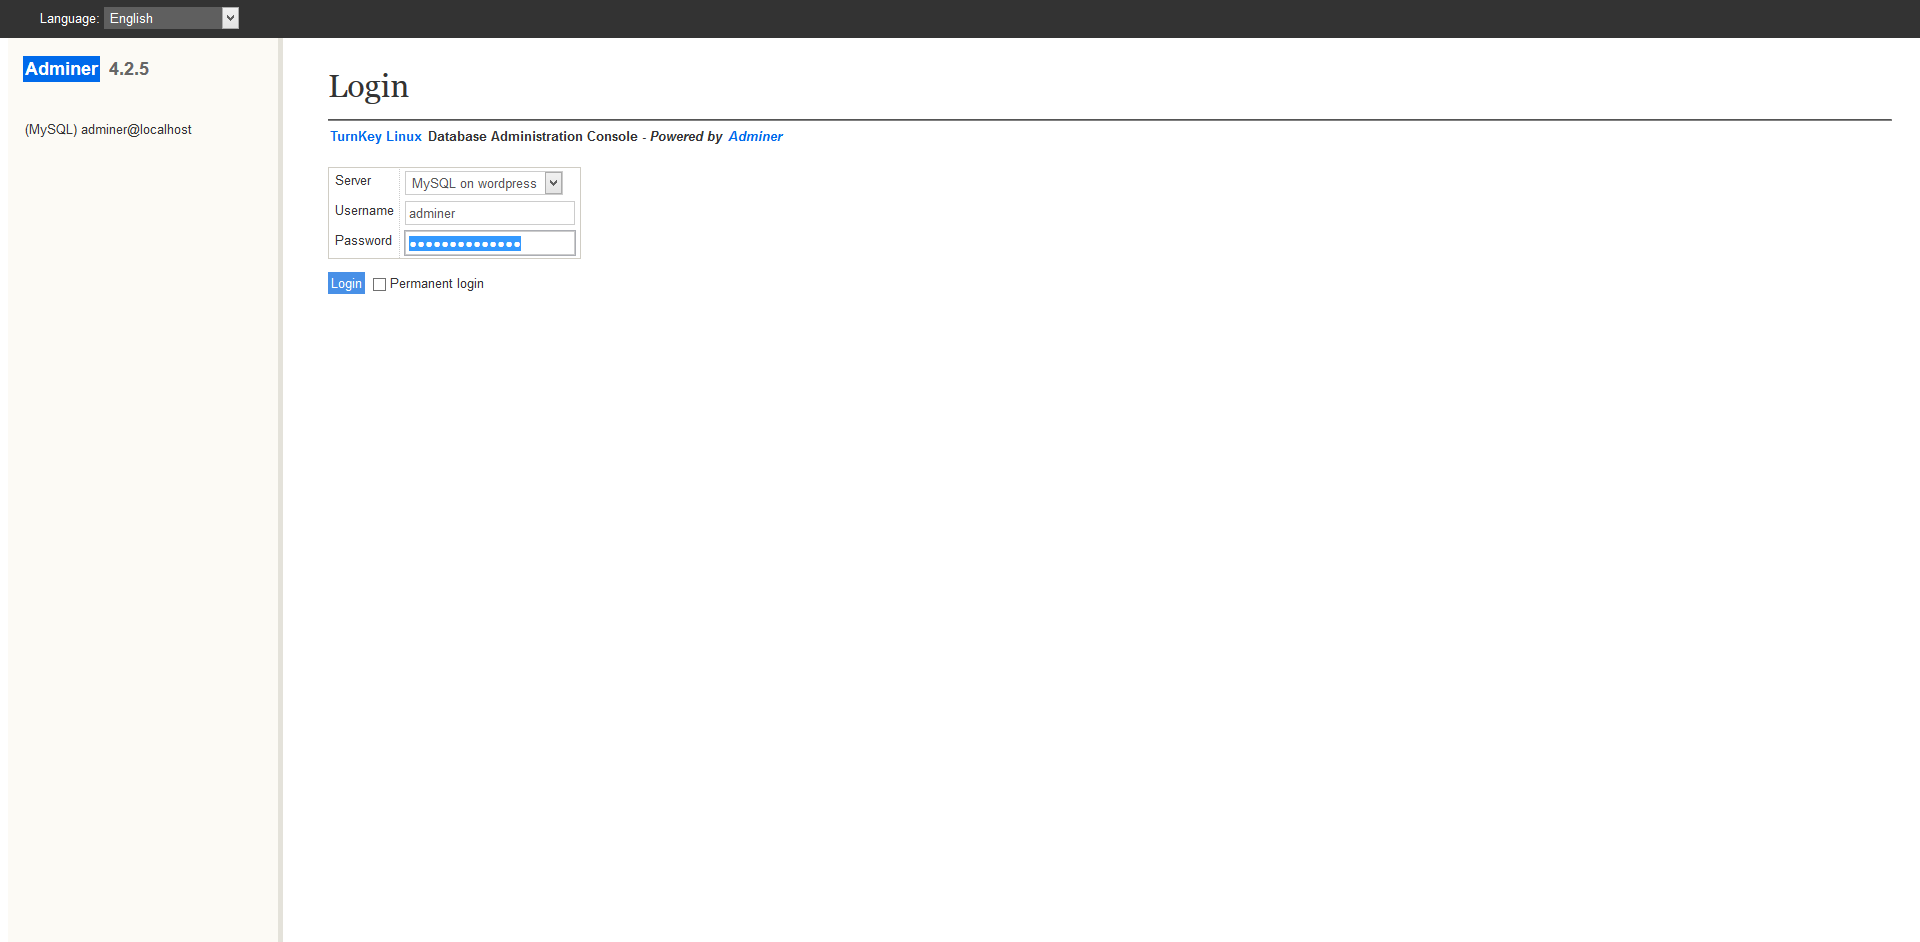
5. We enter the username and password and hit the „Login“ button – if the credentials we used are correct, the system will log us in and show the initial screen
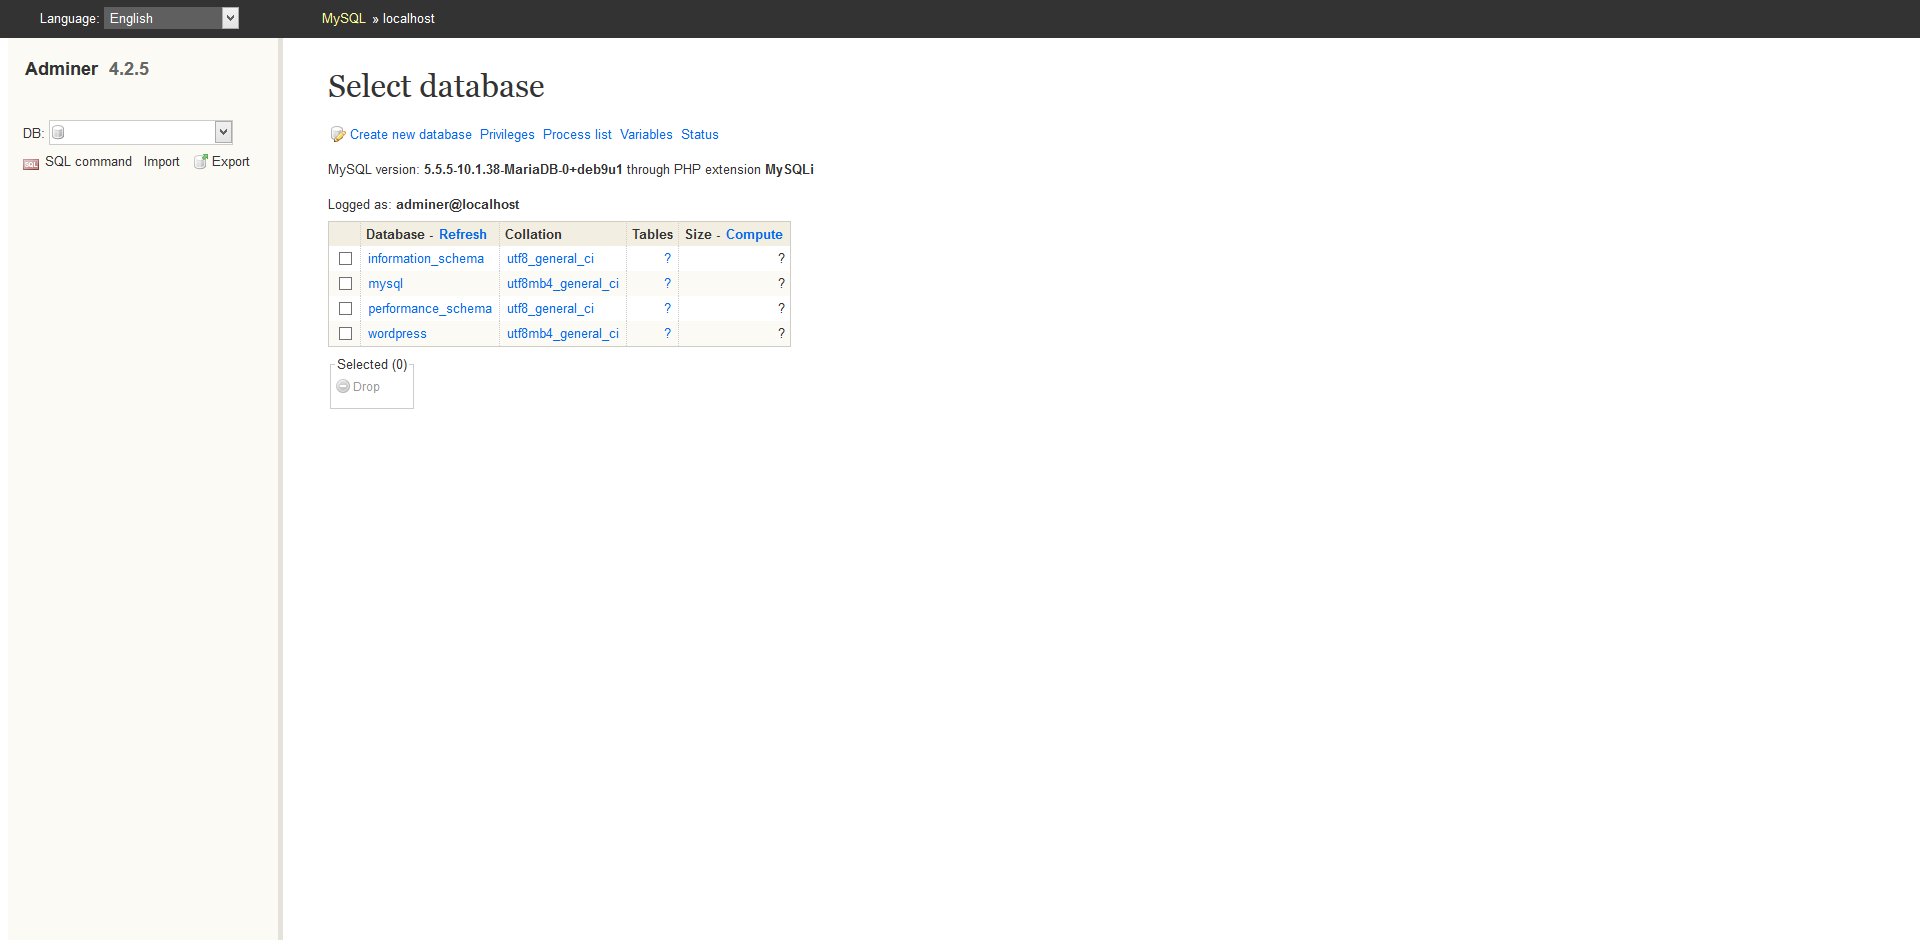
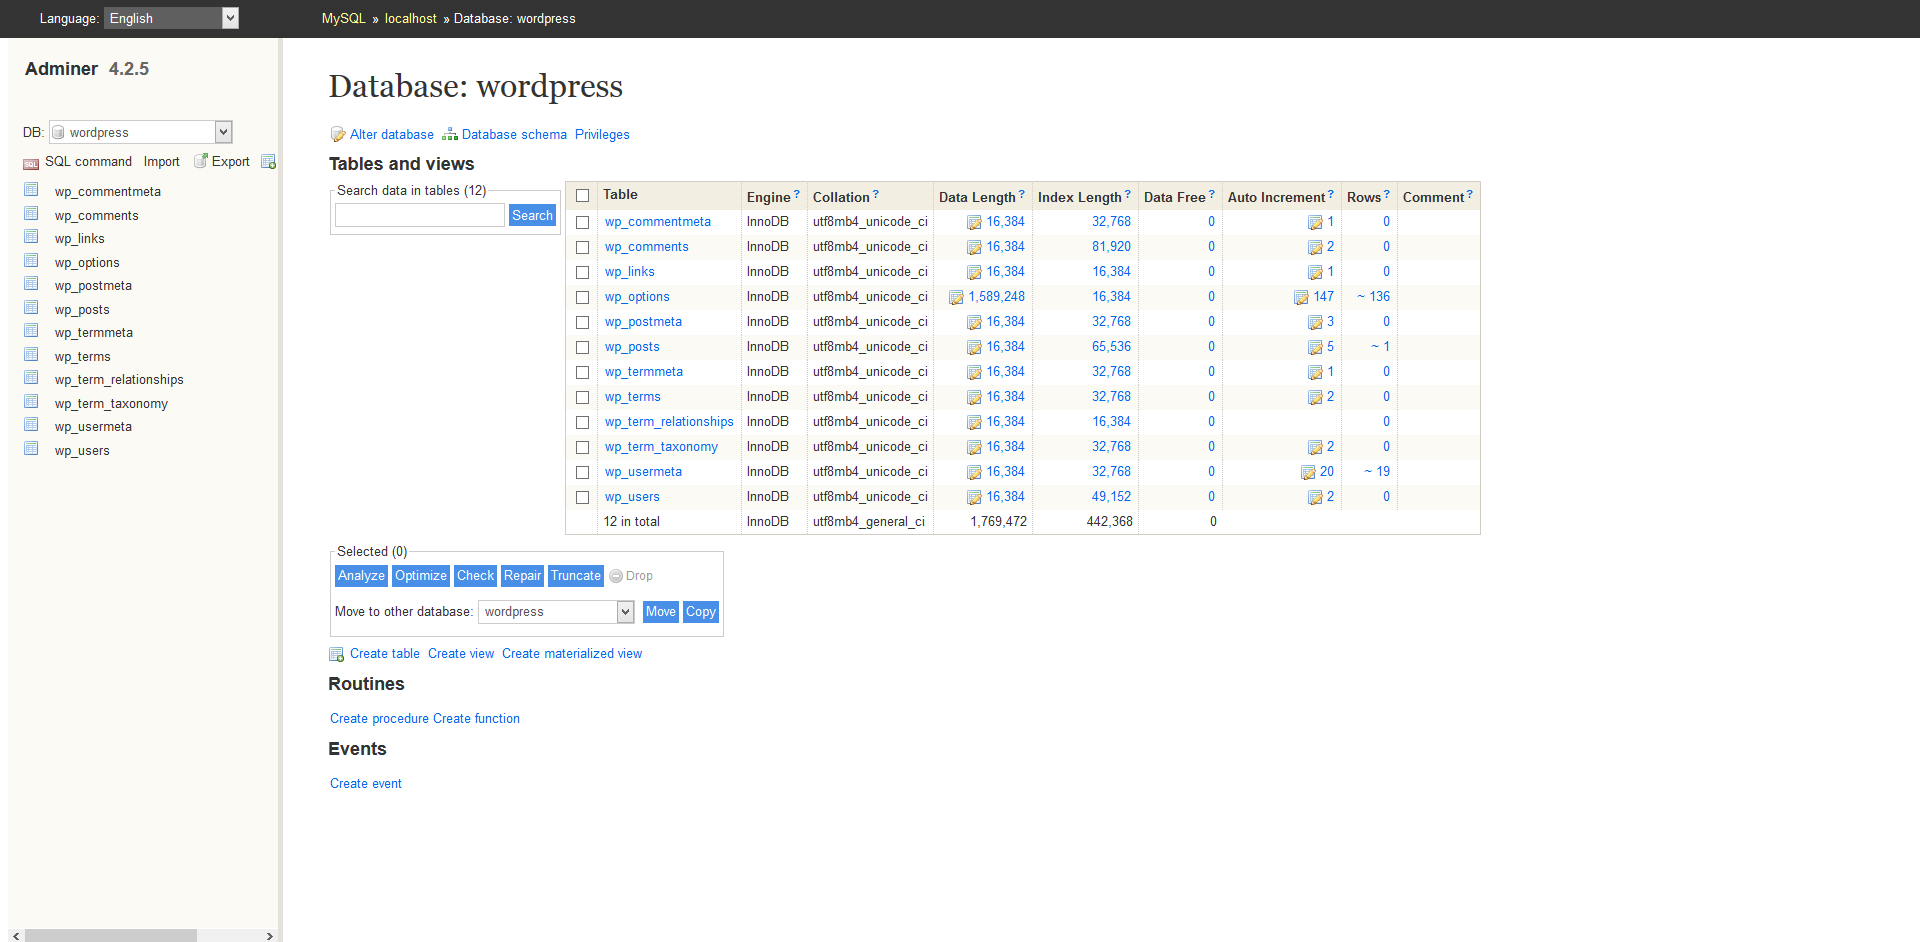
6. We can choose from basic database management operations