The description of the Public Cloud service
The Home at Cloud brand offers not only classical data centre services but also those based on virtual machines. Amongst them is the VPS, which is designed for running one or just a few servers, which should be running non-stop. The Public Cloud / IaaS / Virtual Data Centre service offers greater flexibility and allows the user full control over the resources of his/her Virtual Data Centre. This walkthrough should show that higher flexibility does not mean insurmountable complexity. Anyone can create a test server in the cloud in ten minutes. And there is quite a short path from a test server to exploiting the full potential of the IaaS platform.
Ordering the Public Cloud service
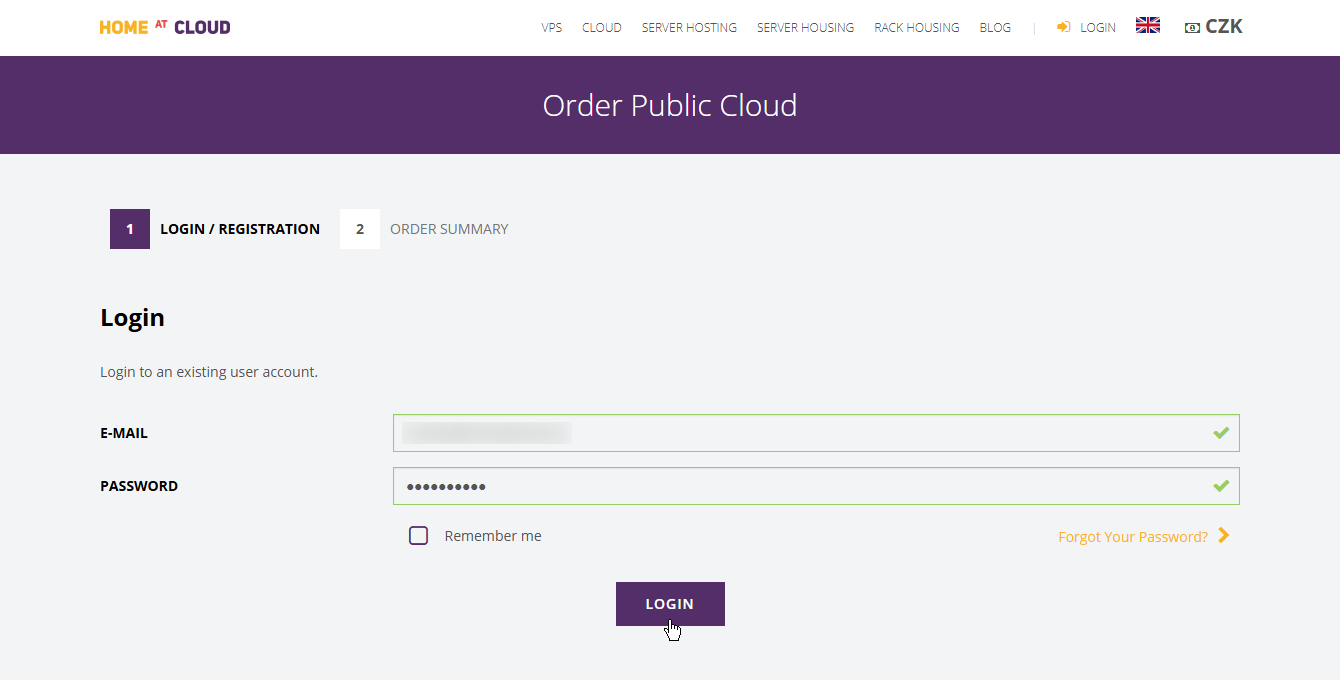
We will start by ordering the Public Cloud service in the Home at Cloud portal.
The system will prompt us to enter login credentials (or to register new ones in case we do not have them yet).
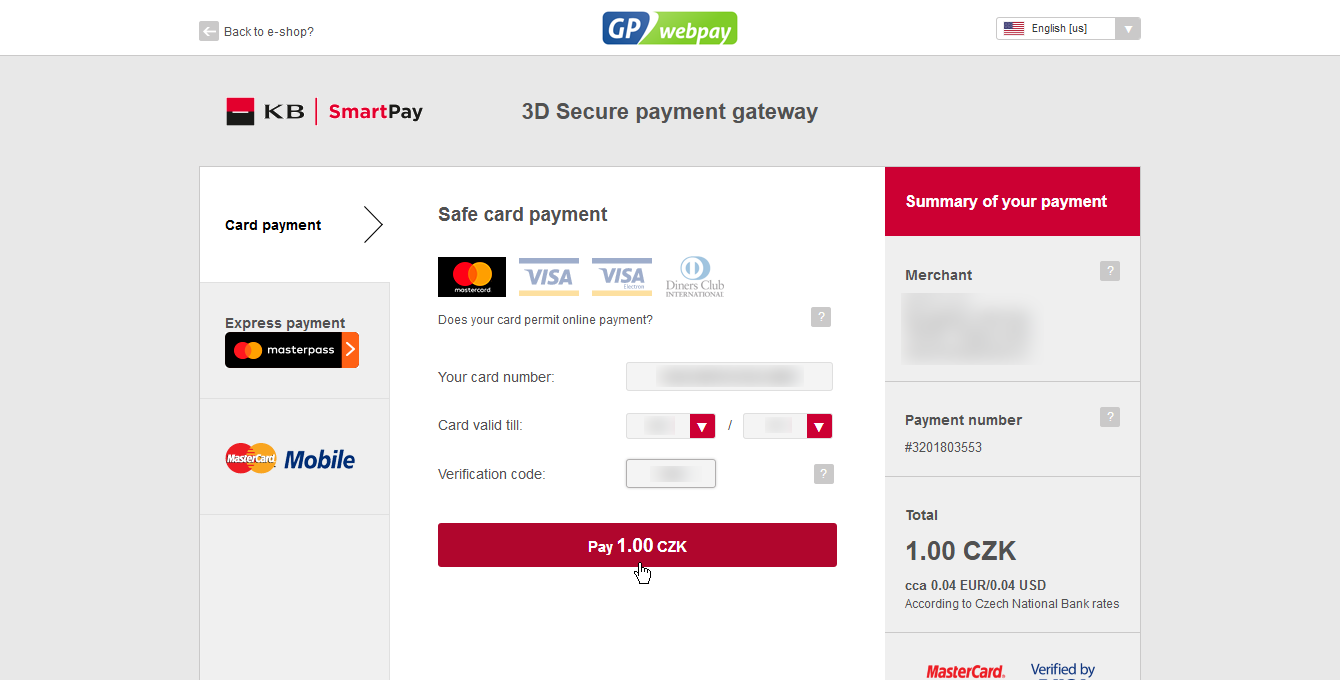
After logging in, the system will present us with an order summary. The cloud is payable only through a credit card. The billing is pay-as-you-go and is done weekly. The payment of 1 CZK is refundable and serves to validate the credit card number.
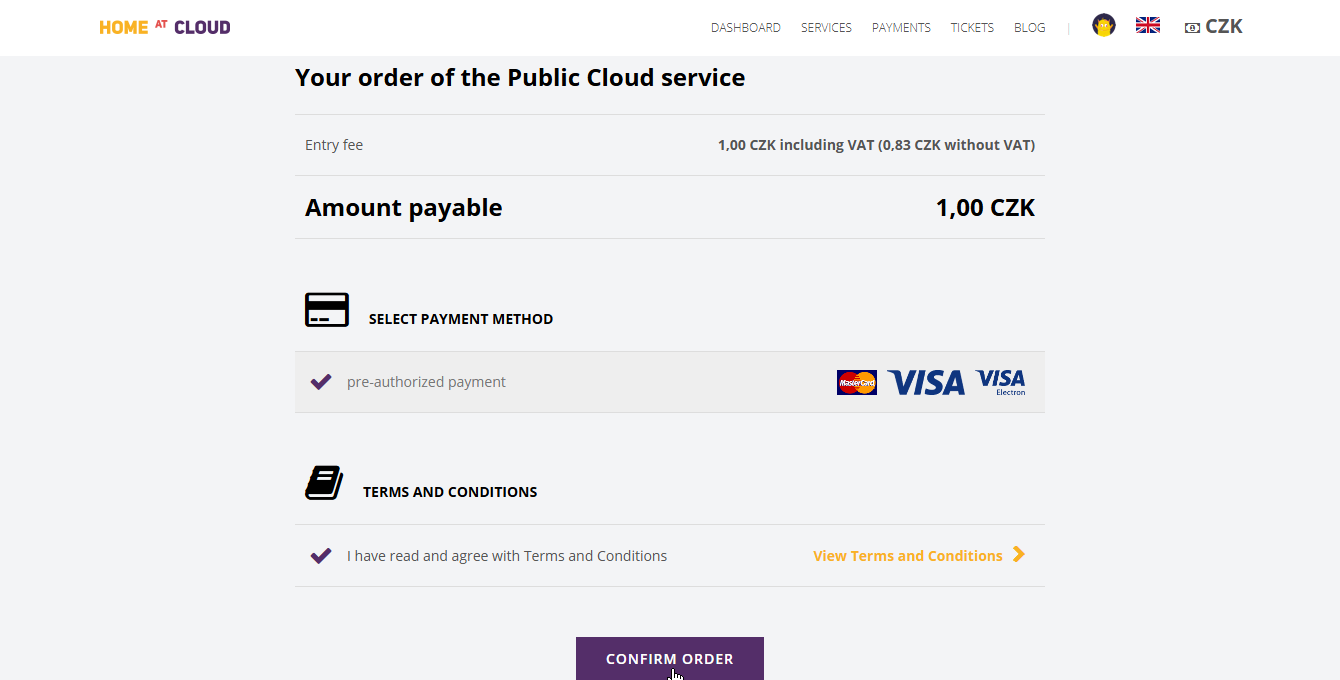
The provider of the Home at Cloud service does not have access to your credit card number. All card-related operations are handled by a secure banking institution.
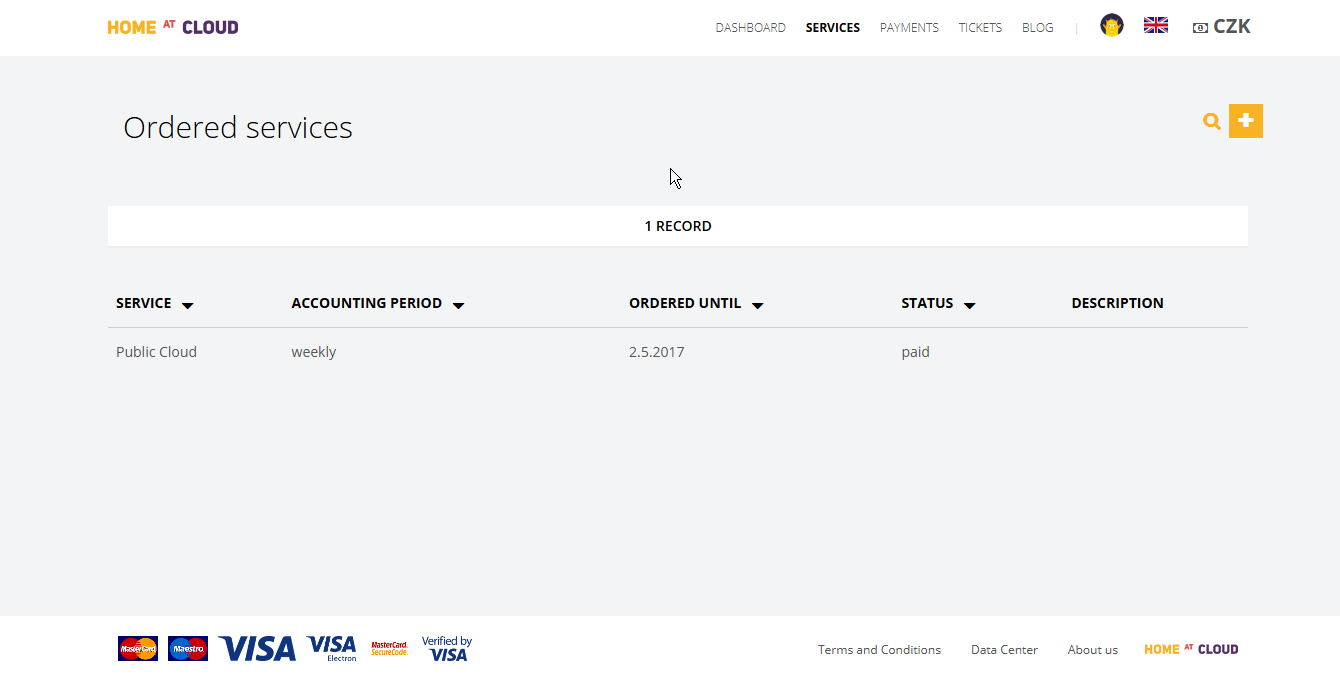
After the payment is processed, we can see that Public Cloud is amongst our ordered services.
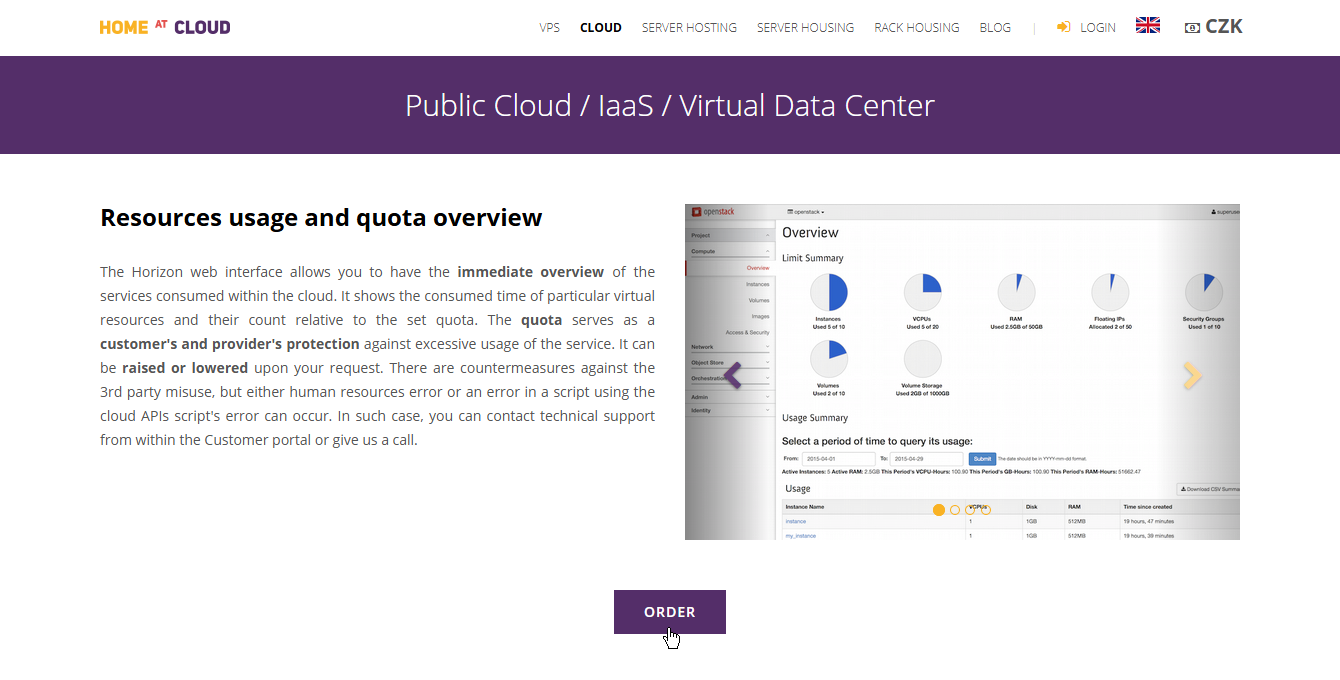
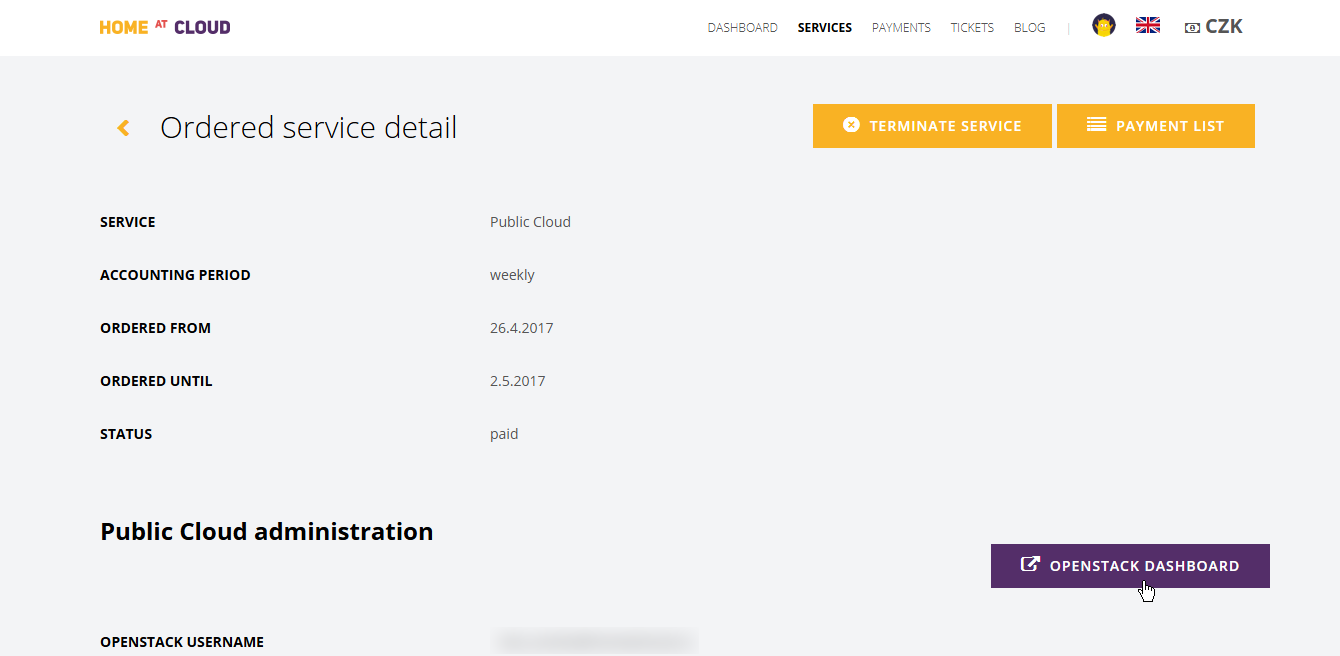
After clicking on the service we get its details. On this page, we will find, amongst other information, the record of resources consumed in the cloud measured every day. However, on a freshly created account, it will be empty.
The OpenStack control panel – Horizon
Right now, we will make use of the information about the username for OpenStack (from the e-mail confirming the establishing of the service) and of the link to its control panel Horizon. The password for the username should have arrived in our e-mail inbox by now along with an invoice for the 1 CZK activation payment.

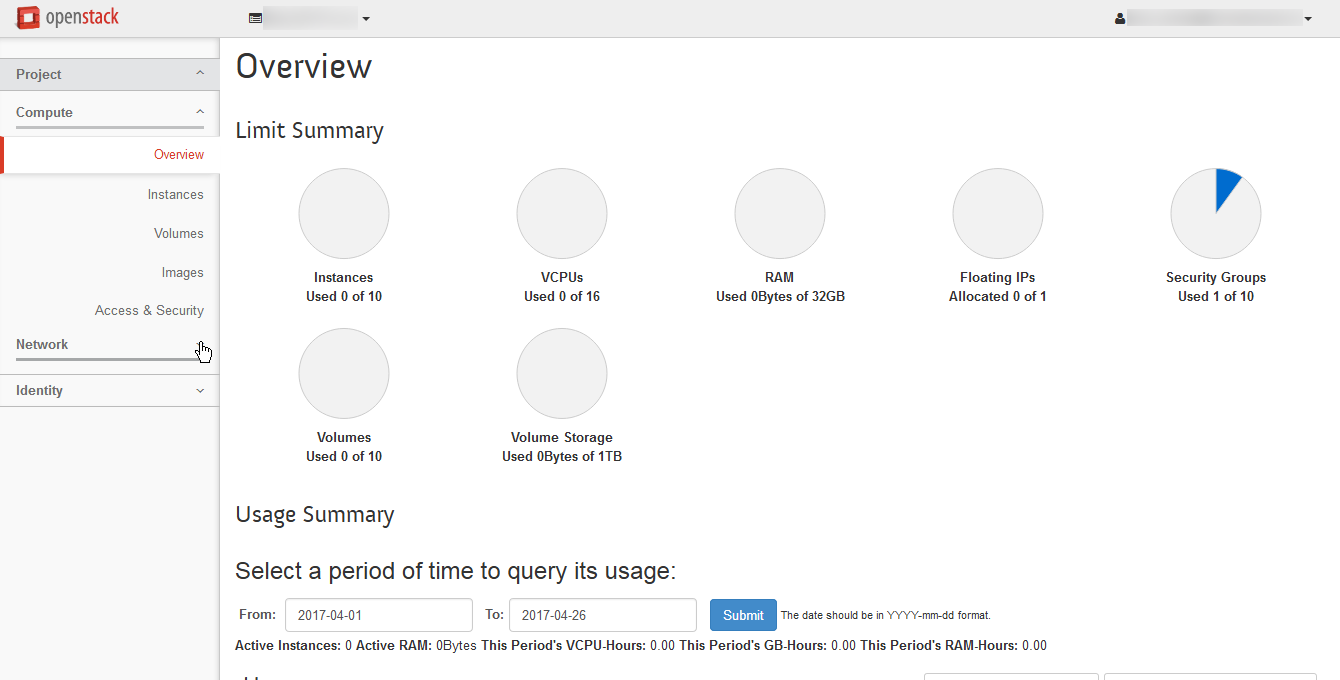
The first thing we see is a summary screen of our quota and usage thereof.
Let’s have a look at the resources we already have in our account. Click Network and then Network Topology.
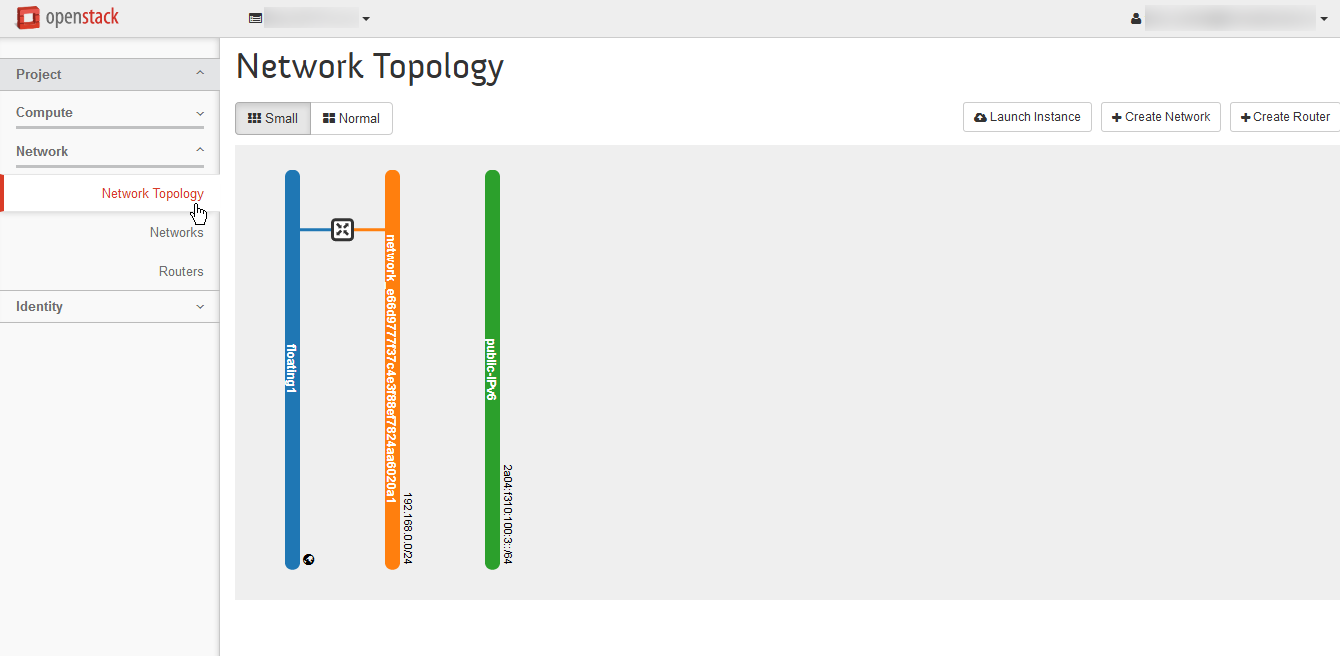
We can see that we already have a virtual network pre-created. This network is private and visible just in our project. It is connected through a virtual router to an external network, from which public IP addresses can be allocated. There is also one network where IPv6 addresses are directly available. This network is shared with other users’ projects. Let’s go back to the Compute tab and the Access and Security menu.

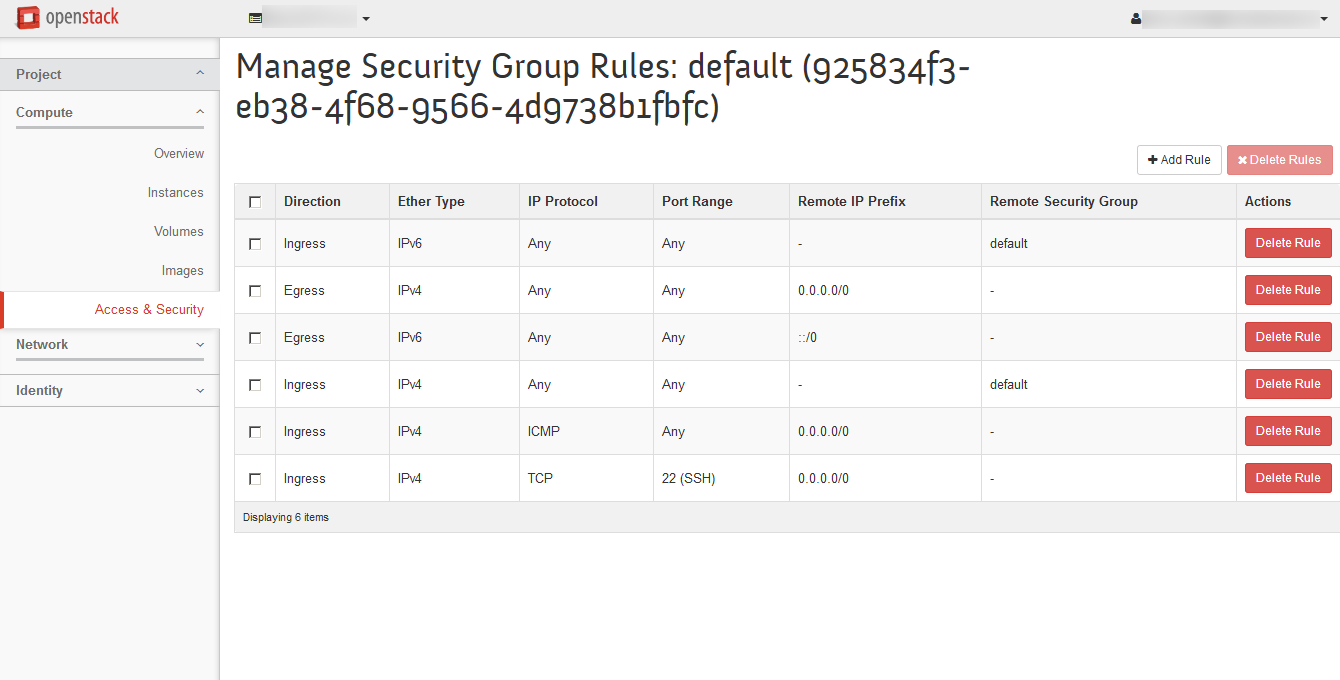
On the first tab, Security Groups, there are firewall configurations which can be attached to our virtual machines. Let’s have a look at the only existing entry.
The default configuration allows any traffic to leave the instances but only allows ICMP and SSH into them. Don’t forget about this when you install new services into your VMs!
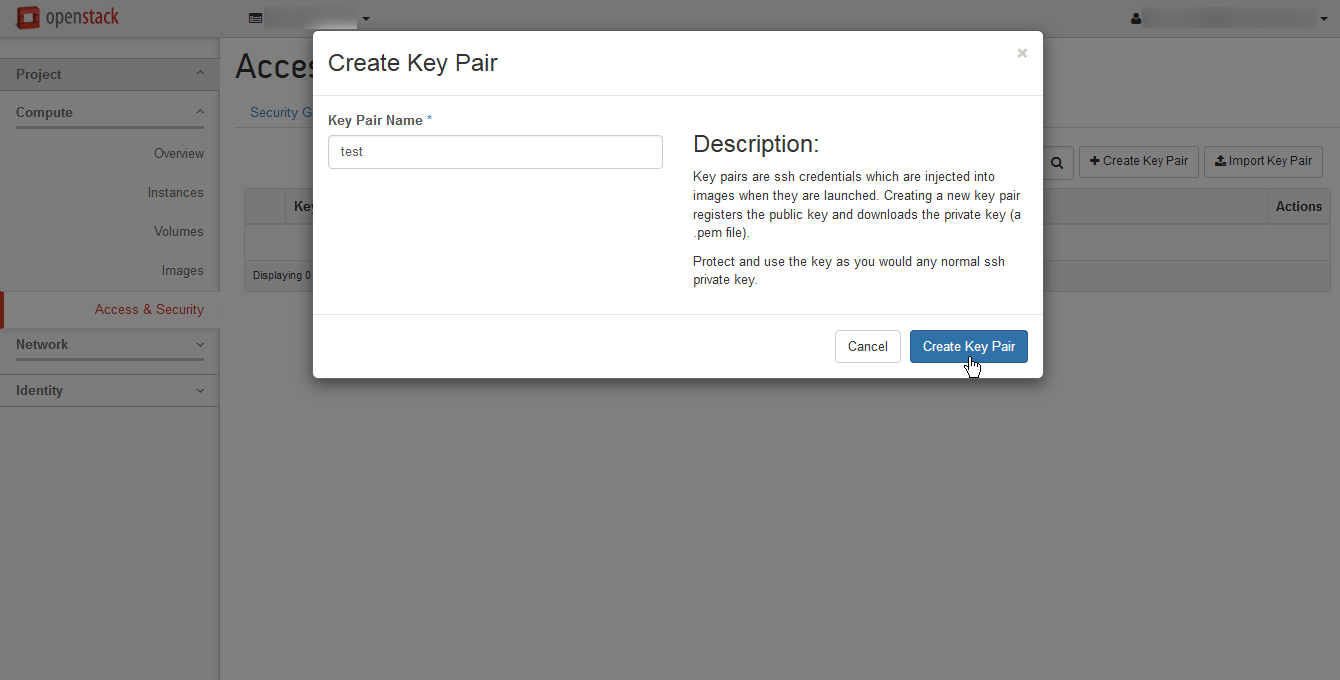
Right on the next tab from Access and Security, that is Key Pairs, we can see a list of the public keys used to log into the instances.
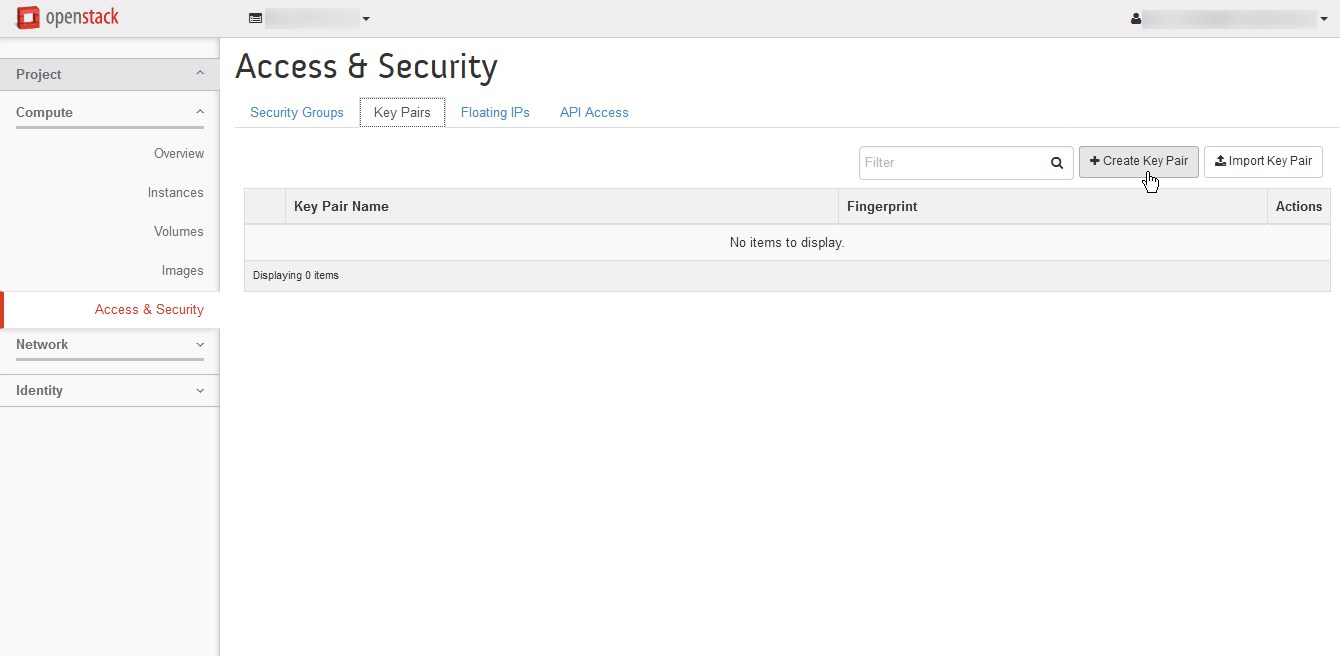
We can import existing keys, but right now we’ll let the cloud generate one for us. The only parameter that needs to be filled in is the key pair name. After we press Generate, the system will download the private part to our computer and save the public one in the cloud.
Creating the virtual machine instance
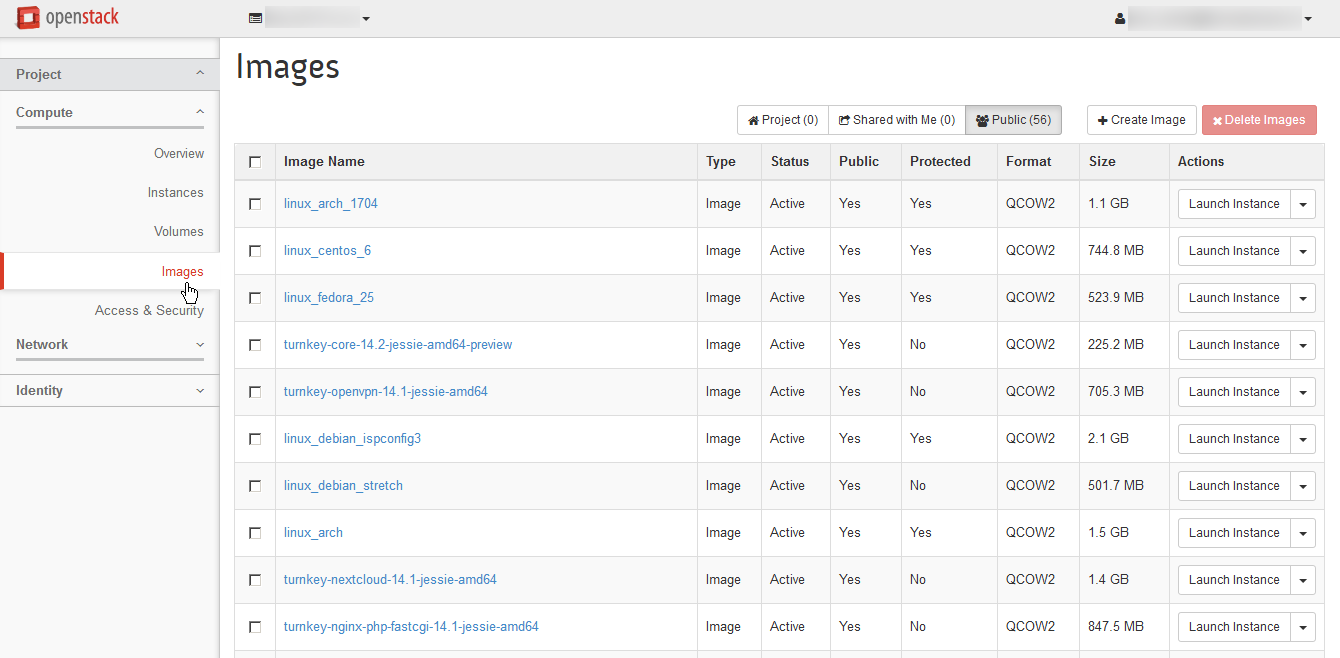
One more thing that is available in a new cloud account is a catalog of operating system images under the menu Compute, submenu Images. Here we see all the images from the VPS service and maybe some more. Let’s select a basic image with a Linux distribution, e.g. linux_debian and press Launch Instance.
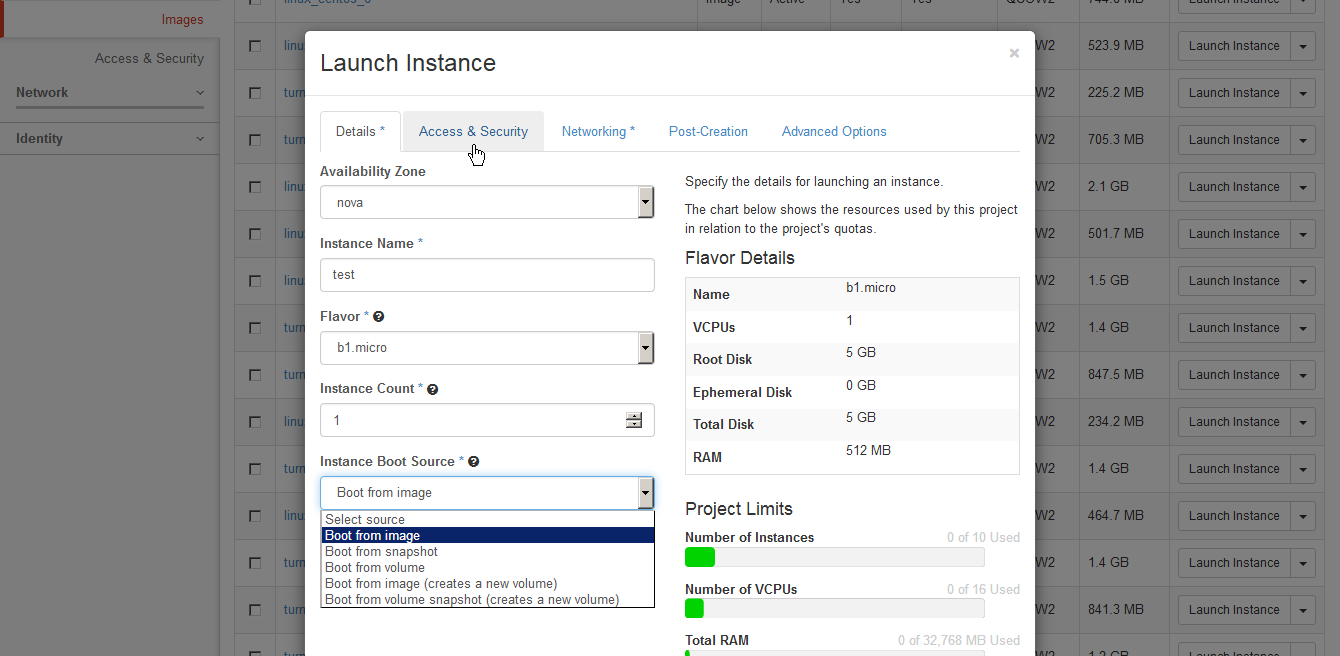
The system will present us with a dialog where we have to type a name of our new instance and select some important parameters. The first of them is the Flavor, which determines the size of the VM created. The smallest, b1.micro will be sufficient. The following table depicts the available flavours.
| Flavor name | vCPU | RAM | SAS Disk |
|---|---|---|---|
| b1.micro | ½ | 512 MB | 5 GB |
| b1.small | 1 | 1 GB | 10 GB |
| b1.medium | 2 | 2 GB | 20 GB |
| b1.large | 4 | 4 GB | 40 GB |
| b1.xlarge | 8 | 8 GB | 80 GB |
| m1.micro | ½ | 1 GB | 10 GB |
| m1.small | 1 | 2 GB | 20 GB |
| m1.medium | 2 | 4 GB | 40 GB |
| m1.large | 4 | 8 GB | 80 GB |
| m1.xlarge | 8 | 16 GB | 160 GB |
| c1.small | 2 | 1 GB | 20 GB |
| c1.medium | 4 | 2 GB | 40 GB |
| c1.large | 8 | 4 GB | 80 GB |
The second important choice here is the Boot Source, which selects the storage type for the system disk of the instance. Boot from image is the basic option which downloads the image to a compute node where it will run. The SAS disks of the compute nodes are cheap and don’t have guaranteed speed and although the cloud is built on quality hardware, neither the durability of this storage is guaranteed. It is useful for instances, which do not hold important data and can be quickly recreated at any time.
The second most important option is Boot from image (creates a new volume), which downloads the image to the highly performant and highly durable SAN array. You can also specify any size you want and ignore the constraints of the Flavors. This should be used for singleton instances, and e.g. for migration of physical machines to the cloud. Instance and volume storage can, of course, be combined. In that case, start the instance using the basic option and attach an empty Volume later.
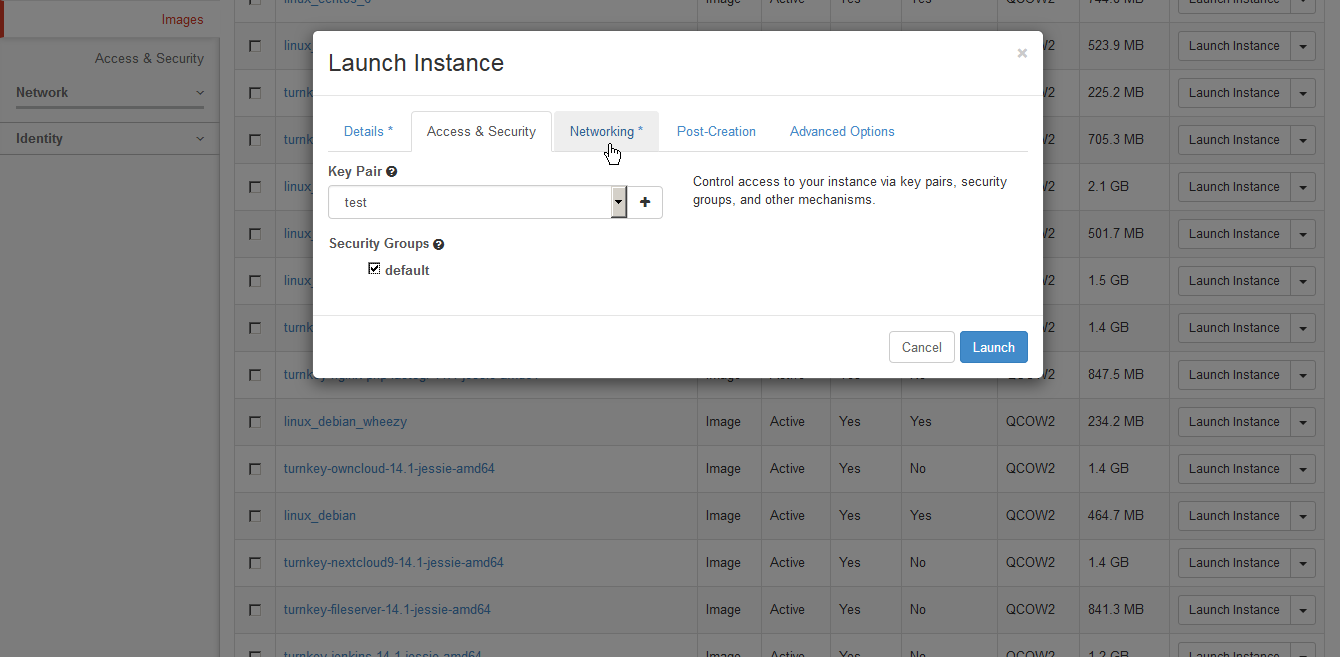
On the next tab of the new instance dialog, we can choose a Key pair and Security group to launch the new instance in. Because we only have one choice from each, we don’t need to set anything here.
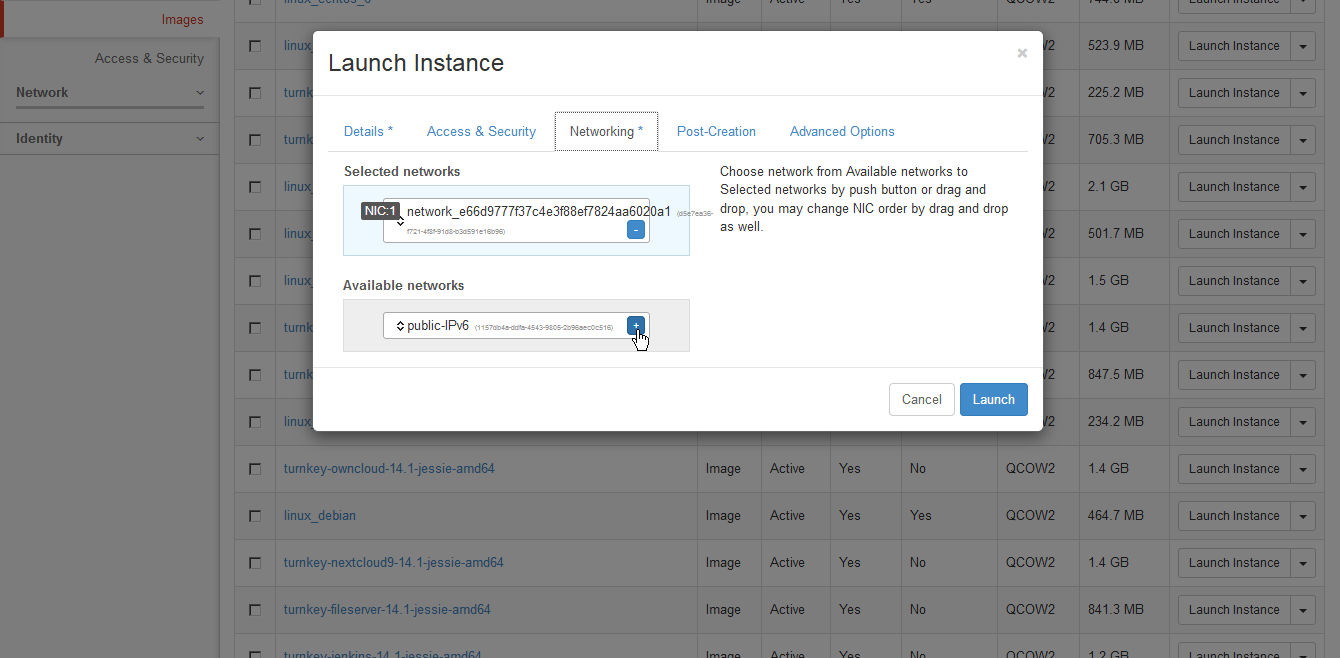
The Networking tab allows the selection of networks which should be attached to the new VMs virtual network interfaces. It is possible to choose either our private IPv4 network or both that and the public IPv6 network. Please don’t choose only the IPv6 network for new instances because in that case, the instance will not get the SSH key and you will not be able to log in. (This is a limitation of the OpenStack metadata service.)
The second tab from the right allows passing some data to the newly created instance. All the provided images contain the cloud-init package, which expects a structured file beginning with the #cloud-config mark. Using this file, one can define actions such as adding a user, installing a package, mounting a disk, writing a file, running a script, powering off after finishing all actions, etc. The documentation can be found at this address.
All the images can also interpret a script beginning with the interpreter specification, such as #!/bin/bash. It is possible to skip the introduction screens of Turnkey GNU/Linux images using the Preseeding mechanism, which entails writing the necessary parameters to a file before the user logs in. The documentation can be found at this address.
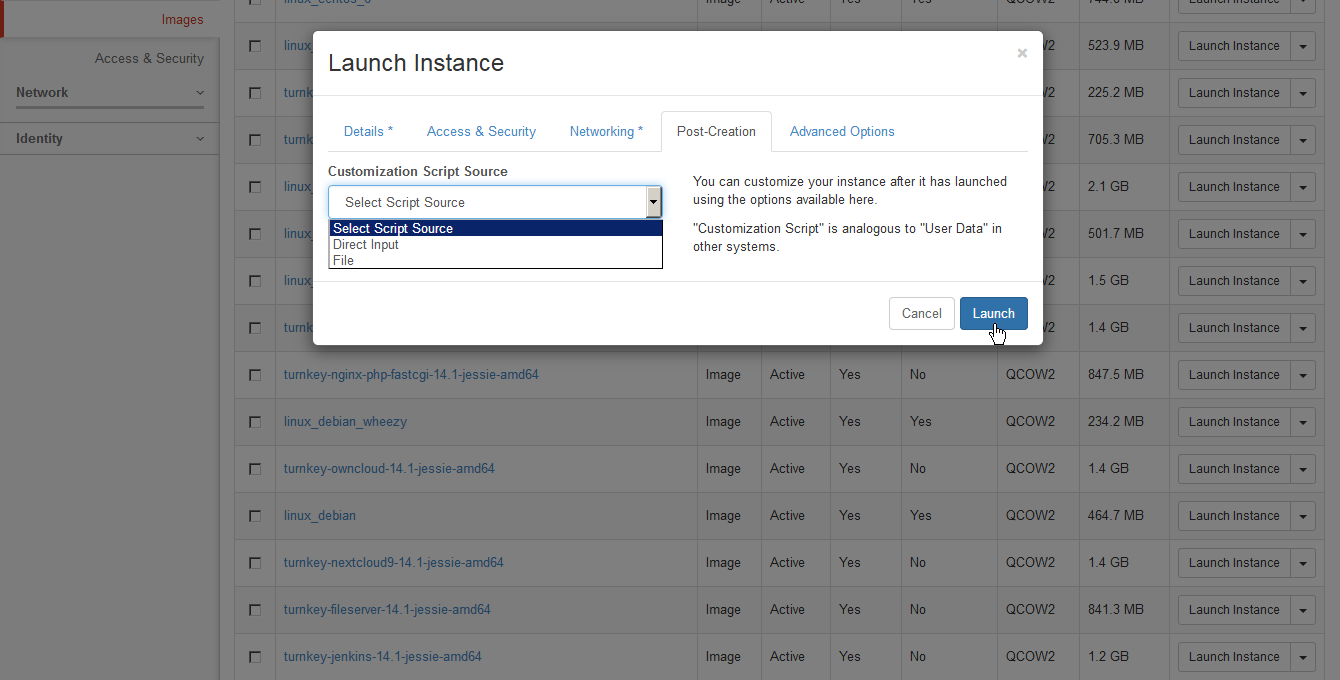
For now, we just want to run a test instance, so we leave this tab empty. Once we press the Launch button, we should see the new instance in the Spawning state. In a few tens of seconds, it should become Active.

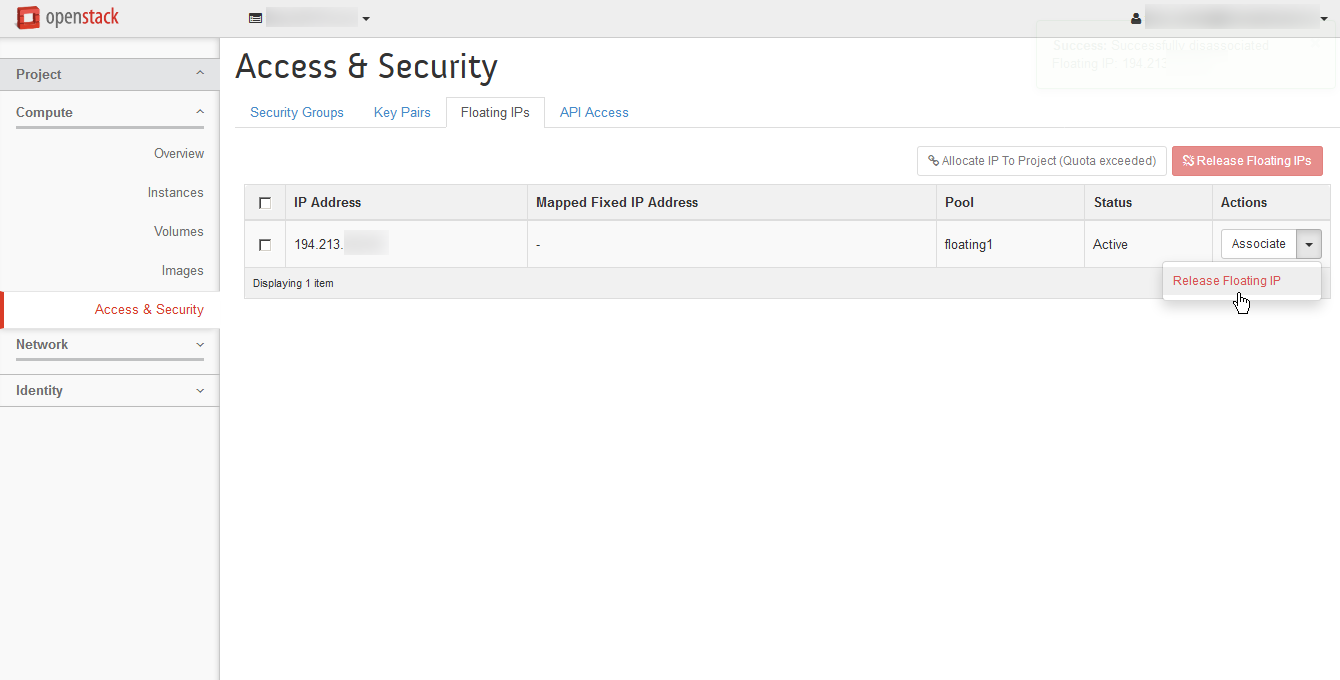
To connect to the new instance from our computer using IPv4, we need to assign it a public address. In OpenStack, this is done using the Floating IP mechanism. We choose Associate Floating IP from the menu on the right in the instance list.

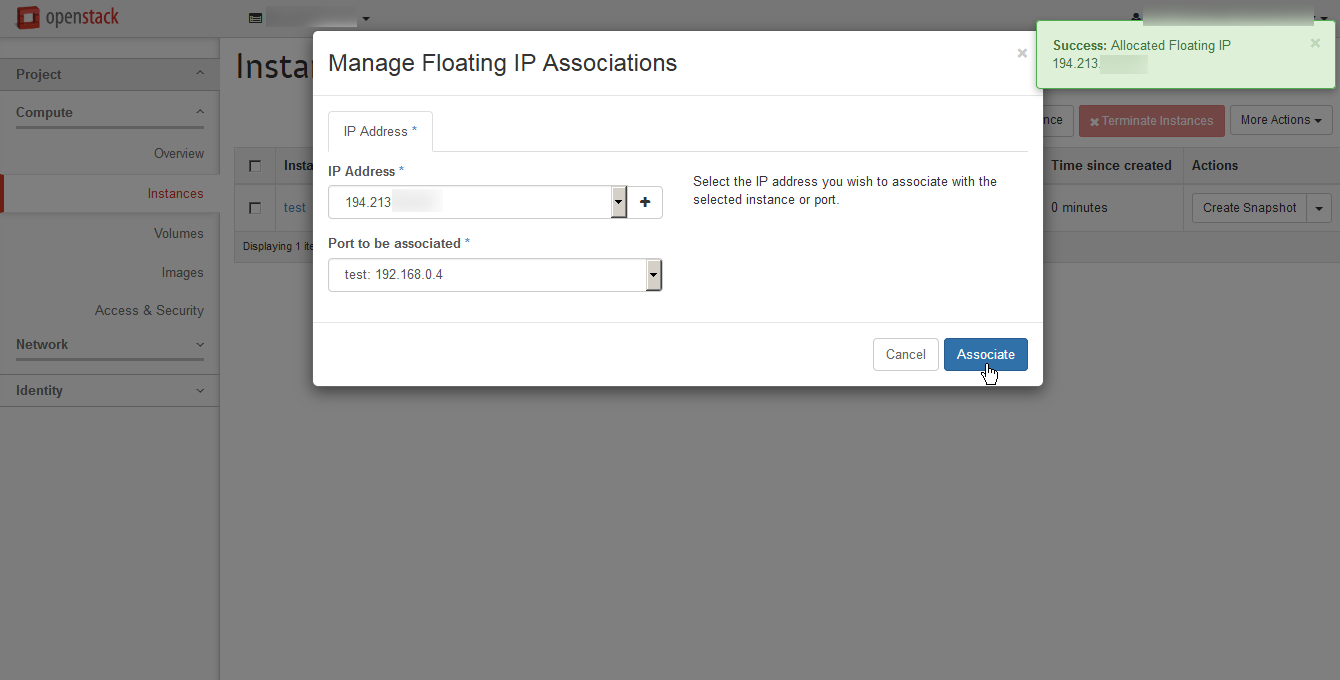
The Floating IPs can float between different instances or even be unassigned. They are retained as long as they are assigned to the Project. We have no Floating IPs in the Project yet, so we press the + button to allocate one.
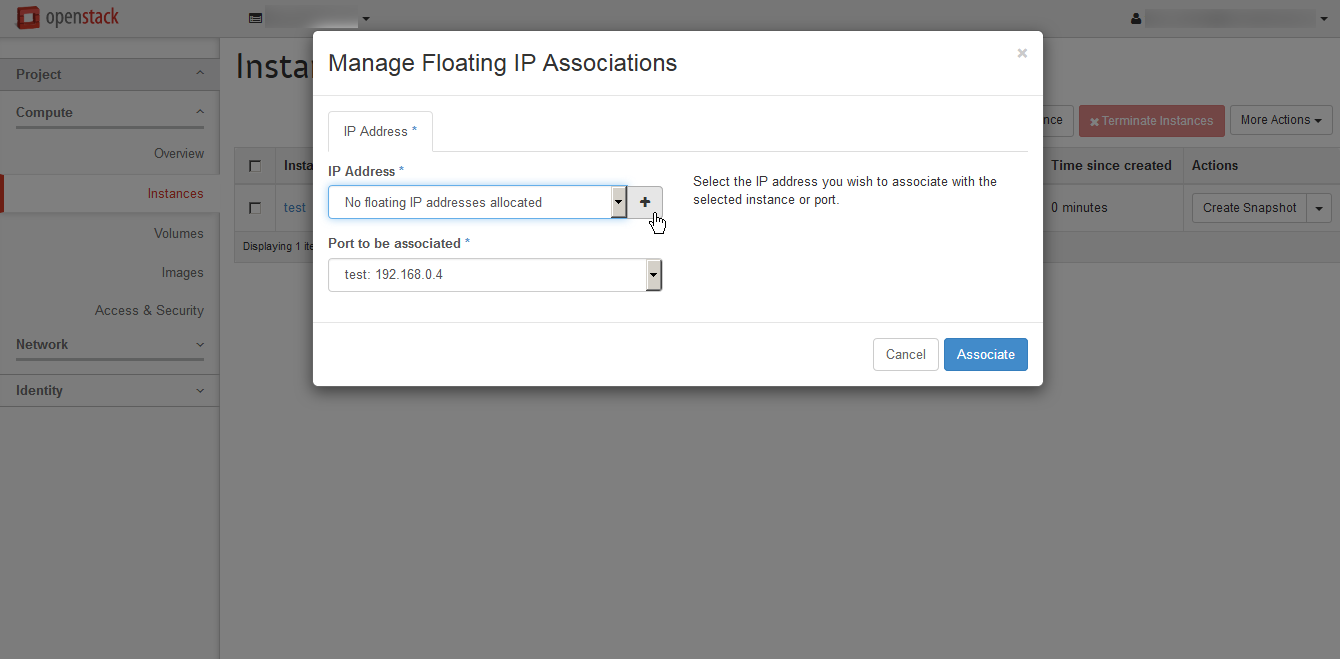
Now we can confirm the dialog and thus associate the address with our instance. (In case you have connected the instance also to the IPv6 network, take care not to select its IPv6 interface as the target. OpenStack does not support NAT (Network Address Translation) with IPv6).
Connecting to the VM instance using SSH
Linux, MacOS
For Linux or MacOS users, connecting to the instance is very easy. You can open a terminal and connect to your instance using SSH. Take care to give strict permissions to the private key file or OpenSSH will refuse to read the key. Then, use the –i switch of the ssh command to specify the key file and don’t forget to use the correct username for the operating system you have chosen (in this case, debian). Use root when in doubt.

Windows
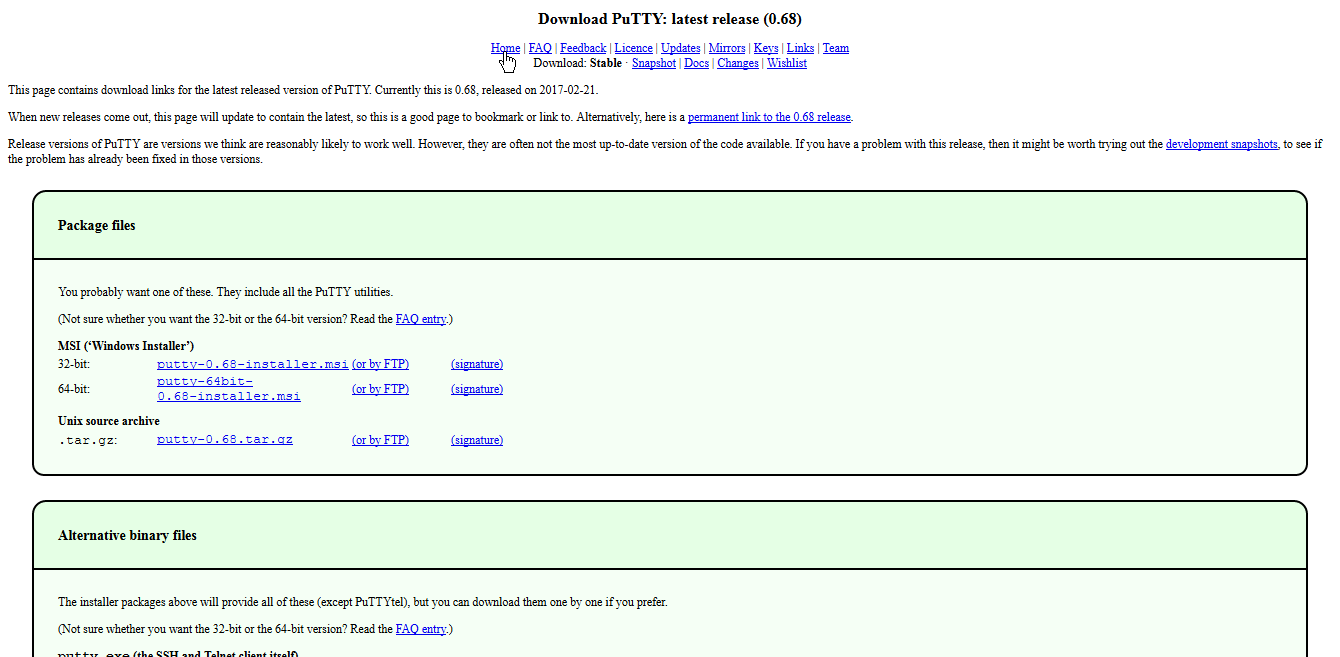
Windows users will probably make use of the popular PuTTY terminal emulator. It will be necessary to download at least the PuTTY and PuTTYgen programs.
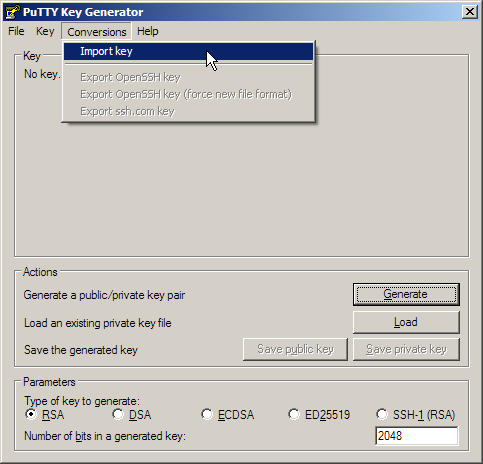
PuTTYgen will be needed to convert the private key file to the PuTTY-specific format. First, we’ll Import the key downloaded from OpenStack.
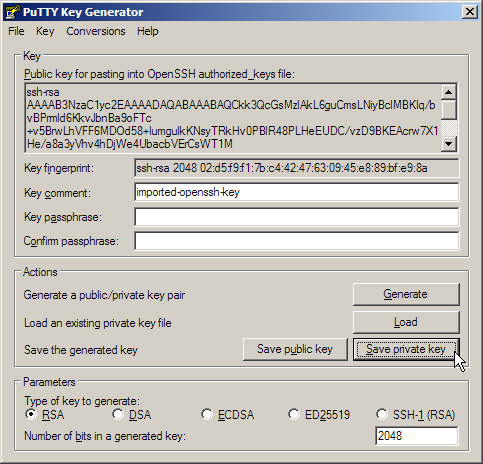
And then we’ll save the key in PuTTY format.
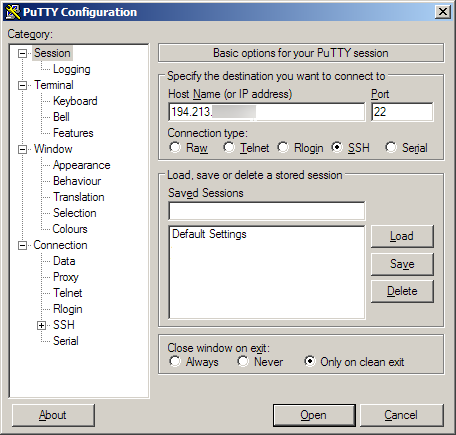
It the PuTTY program itself, we need to fill in the server address on the main page.
And specify the private key file on the Connection tab, submenu SSH, Auth page.

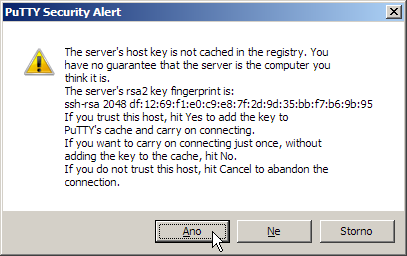
After pressing Connect, the system will ask us whether we trust the key of the remote server.
And next, what user we want to connect as. Notice that when you choose root, the images will not let you in but will tell you what username is correct.
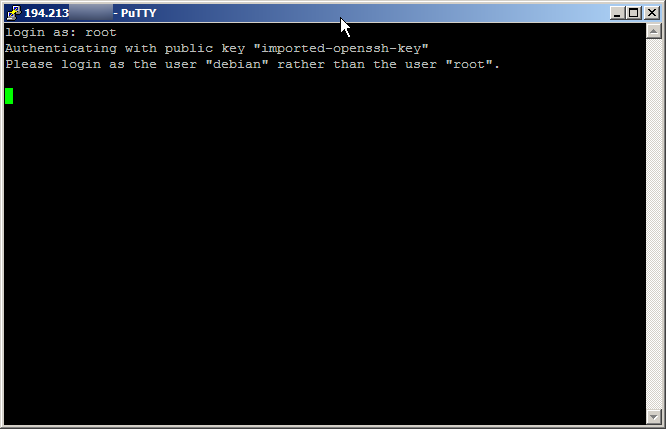
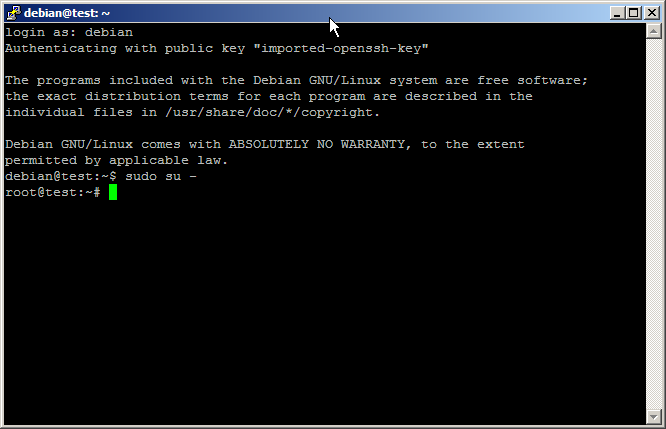
On the second try, we are in and can do whatever we please, including switching to the root user using sudo.
Terminating the VM instance
After we finish playing around, we should terminate the instance so that we do not pay for an empty server which we can start again at any time.
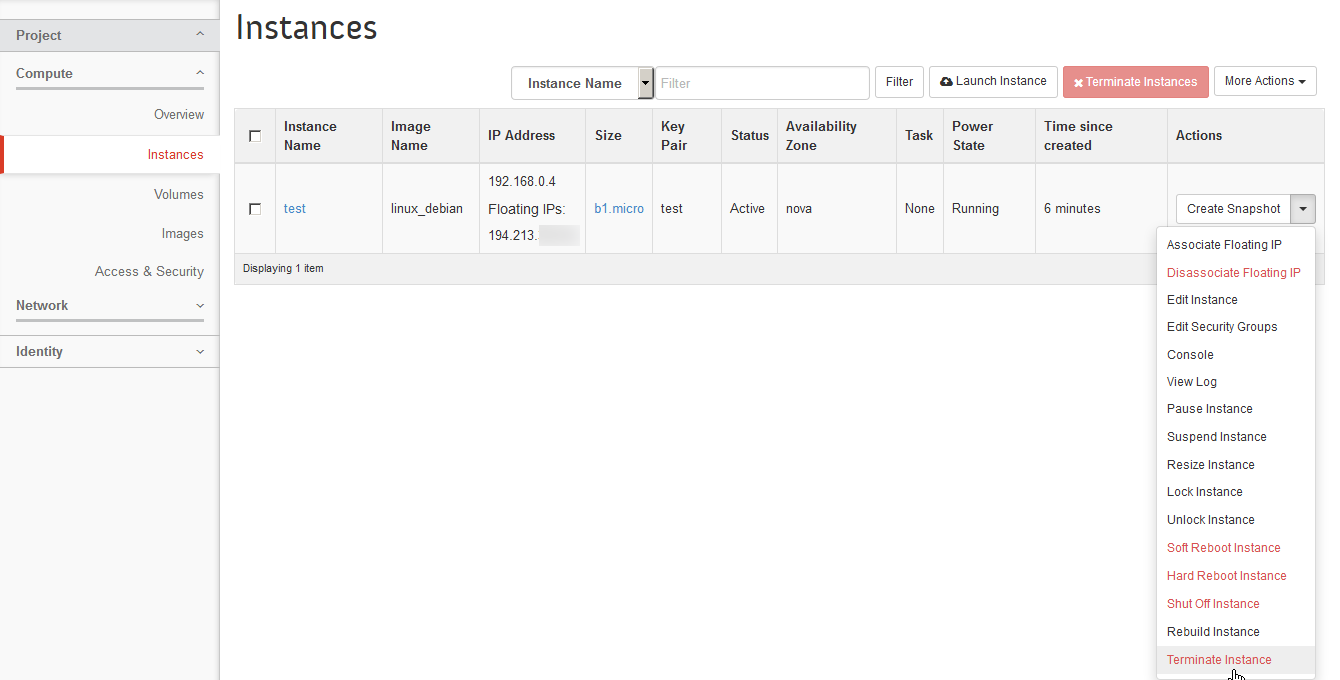
And we should not forget to got to the Compute menu, Access and Security tab to release the Floating IP, because that’s billable as well. However, once you release it, you will not get back the same one, but rather a random address every time.