
What is a TurnKey Linux image?
The TurnKey Linux (TKL) image is an image of the operating system (OS) with pre-installed software (SW), which is highly suitable for virtual machine installation and allows getting the software up and running quickly. As the title suggests, the operating system inside the image is Linux, namely Debian (currently the version 9 – Stretch). The pre-installed software differs between the particular TurnKey Linux images – typically it might be for example one of the content management systems (CMS) – WordPress, Joomla or Drupal or a database (DB) – MySQL, PostgreSQL, etc.
What is the TurnKey Linux image good for, are there any limitations?
The TKL image can make the management of your virtual machine significantly easier. Also, it can accelerate the deployment of the desired software considerably. Most of the services inside the TKL images are configured so that they run at a certain security level immediately after the system is started (so-called out-of- the-box). The TKL images will help you with the basic security, monitoring and software updating of your virtual machine.
Which TurnKey Linux images are currently available?
Currently we provide the TKL images stated in the following table. All the images are based on the OS Debian 9 (Stretch), and the so-called core version of the TurnKey Linux . The detailed description of the core version and particular images which originate from it, will be introduced bellow. The title of the TKL image in the table is a link which will redirect you to the official documentation website of the given TKL image.
The TKL images currently supported
| TKL image title | = Linux | + Software |
|---|---|---|
| LAMP Stack | TurnKey Core 15.x Debian GNU/Linux 9 (Stretch) |
Apache, MySQL, PHP |
| LAPP Stack | Apache, PostgreSQL, PHP | |
| WordPress | WordPress (CMS) | |
| Drupal | Drupal (CMS) | |
| Joomla | Joomla (CMS) | |
| MySQL | MySQL (relational database) | |
| PostgreSQL | PostgreSQL (relational database) | |
| Django | Django (Python framework) | |
| Ruby on Rails | Ruby on Rails (Ruby framework) | |
| Redmine (TurnKey Core 14.2) | Redmine (SCM and project management) | |
| MediaWiki | MediaWiki (knowledge base) | |
| Tomcat on Apache | Tomcat (Java Servlet and JSP platform) | |
| Node.js | Node.js (asynchronnous JavaScript framework) | |
| Nextcloud | Nextcloud (file share and collaboration platform) | |
| LXC (TurnKey Core 14.2) | LXC (Linux containers) | |
| OpenVPN | OpenVPN (VPN solution) |
TurnKey Linux core – what all the TKL images have in common?
The base of all TurnKey image is the so-called core version of the TurnKey Linux . The other images originate from this version and are extended by the particular software, settings and other features regarding the target purpose of the particular image. It is the Debian GNU/Linux 9 (Stretch) on which all the images are based on – currently Debian 9 (Stretch). In addition to this OS, there are further components installed, which together with the given OS, constitute the final core version of the TurnKey Linux – currently the version 15.x:
- Automatic security updates, which are carried out daily at 04:00 (it does not include the update of the TurnKey SW packages (e.g. WordPress) installed from the source code)
- The TKLBAM (TurnKey Backup And Migration) tool, which allows a connection with the TurnKey Hub and automatic backup into partner storages of TurnKey Linux (requires a TurnKey Hub user account, which is why this feature is not initialized after installation), or into other destinations
- Pre-configured monitoring of the system – the Monit tool, which notifies about automatic installations of security updates, availability of WordPress security updates, etc., exceeding of threshold values of RAM (75%), CPU (90%) and/or HDD (90%) of the machine; the notifications are carried out via the email of the machine’s owner; this address is also put into the TKL security mailing list – the user’s confirmation is required and it is possible to opt out at any time
- The hubdns tool allowing for automatic hostname creation (requires a TurnKey Hub user account, which is why this feature is not initialized after installation)
- LVM – the tool for flexible management of disk space
- Shellinabox web console – allows to access the terminal of the machine, without having to use PuTTY or another client, via the web browser, immediately after the machine is started

- Ntp – the tool for automatic server time synchronization
- Other TurnKey tools for the system’s initialization and management, such as inithooks
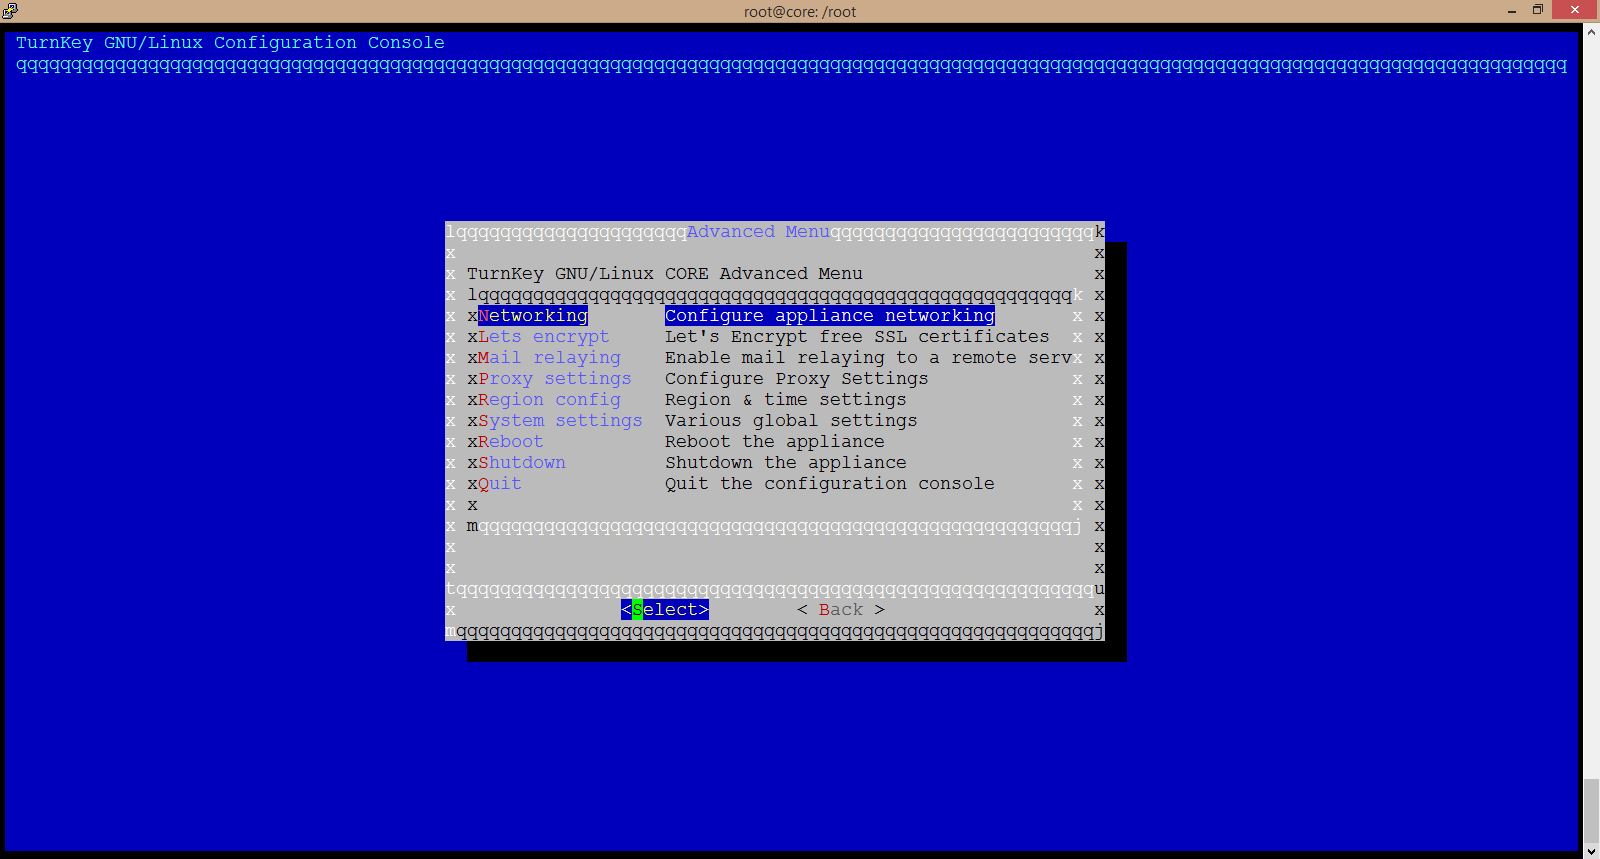
- The confconsole tool, which provides a text graphical configuration console interface for defining some system settings without the need to use the shell. The function areas of the configuration console include: networking, certicicates, mail relaying, proxy settings, region config, system settings, rebot and shutdown.
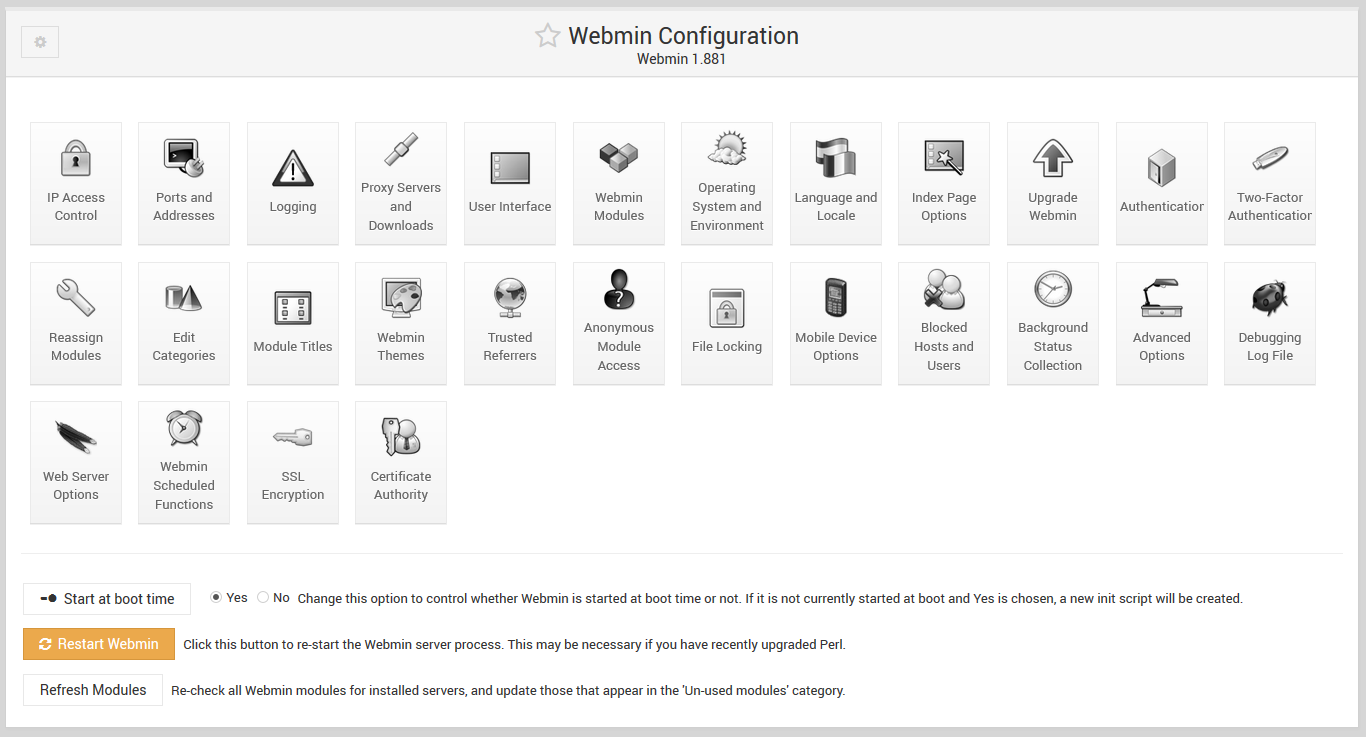
- The webmin tool (currently the 1.88.1 version), which provides a graphical interface for the management of the server, including the following modules: configuration of the firewall, network, backup and migration, time, date and time zone configuration, users, groups, software packages management, password management, system logs, tools – text editor, shell, upload / download, file manager (Java), custom commands, disk volume management, LVM
- The full list of the installed packages can be obtained using the following command:
apt –installed list
If there is a database pre-installed inside some of the images, then Adminer is also available. It is a simple graphical interface for basic management of the database.
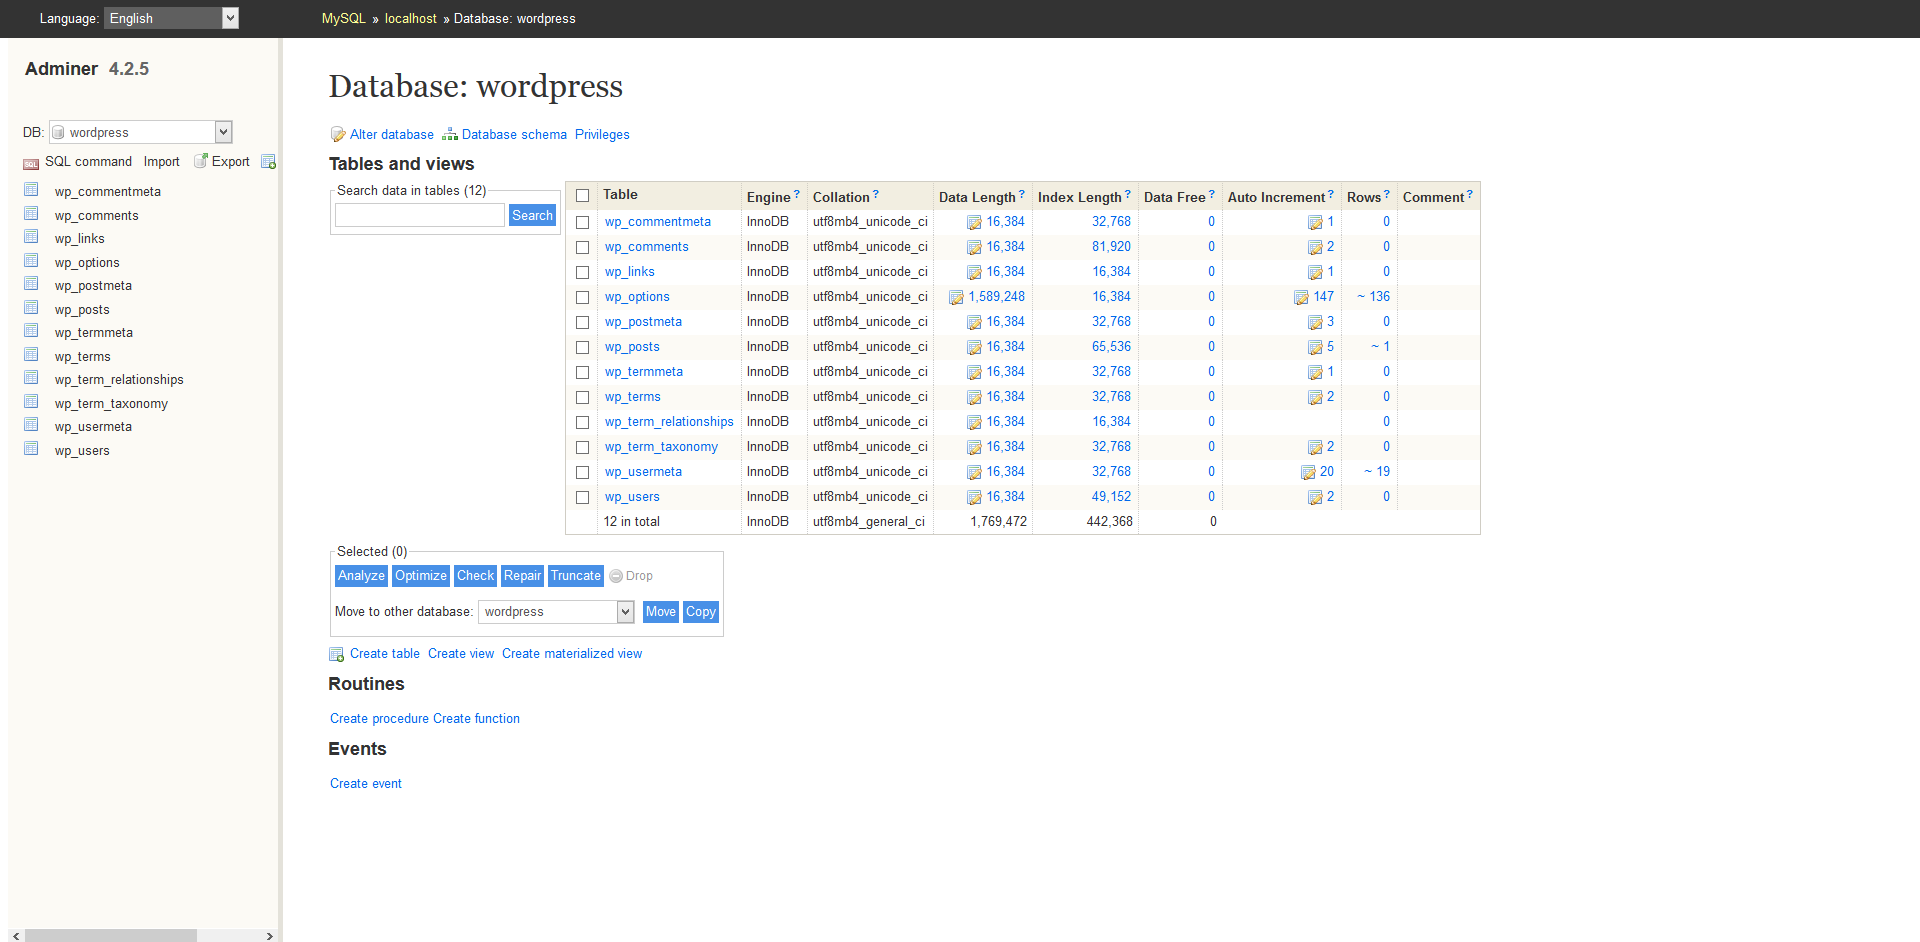
This tool is rather simple and provides just basic operations. However, inside webmin, there are usually pre-installed modules which allow for management of other installed software (if available for such extending software), so perhaps you will prefer this tool to direct management via a terminal.
We created short manuals for the shellinabox, webmin and adminer tools, which may help you get up and running when using these tools. These manuals do not substitute the official documentation of these tools, but it may reduce the time needed for being able to use them effectively and to use the full potential of your server.
The official documentation of the TurnKey Core image is available at: https://www.turnkeylinux.org/core .
Which credentials should be used?
The overview of user accounts allowing the administration of basic tools inside particular TKL images
| TKL image title | shellinabox user | webmin user | adminer user |
|---|---|---|---|
| LAMP Stack | root | root | adminer |
| LAPP Stack | root | root | postgres |
| WordPress | root | root | adminer |
| Drupal | root | root | adminer |
| Joomla | root | root | adminer |
| MySQL | root | root | root |
| PostgreSQL | root | root | postgres |
| Django | root | root | – |
| Ruby on Rails | root | root | – |
| Redmine (TurnKey Core 14.2) | root | root | – |
| MediaWiki | root | root | adminer |
| Tomcat on Apache | root | root | – |
| Node.js | root | root | – |
| Nextcloud | root | root | adminer |
| LXC (TurnKey Core 14.2) | root | root | – |
| OpenVPN | root | root | – |
Inside TKL WordPress, Drupal and Joomla it is possible to use appropriate user account allowing the administration of given CMS.
The overview of the user accounts allowing the administration of the CMS
There is no adminer tool, providing the MySQL database management functionality, available inside the TKL Django, TKL Ruby on Rails, TKL Redmine, TKL Tomcat on Apache images, but the database can be managed directly and for that purpose, we use the root or adminer account the same way as if the adminer tool was available. In order to login to the Django administration in case of TKL Django image, we use the admin user account. There is no database inside the TKL node.js image at all.
Inside the TKL Redmine image, we can login to the project management at following address http://IP.address.ofour.server/login, using the admin user account. The access to the repositories inside the image is possible via following destinations:
The access to the repositories managed inside the TKL Redmine image
| Project management: | Access to repositories: |
|---|---|
| Git | git://addr/git |
| Bazaar | bzr://addr/bzr |
| Subversion | svn://addr/svn |
| Mercurial | http://addr:8080 |
Inside the TKL MediaWiki image, we can login to the administration of the MediaWiki knowledge base using the admin user account. We use the same user account for logging into the administration in case of TKL Nextcloud image.
The access to the administration tools inside the Tomcat image is possible via user accounts that are listed in the following table:
The overview of user accounts allowing the administration of Tomcat
| Administration | The address for login into administration | User |
|---|---|---|
| Web applications | http://IP.address.ofour.server/manager/html | admin |
| Virtual hosts | http://IP.address.ofour.server/host-manager/html | admin |
How to change the time zone of the server?
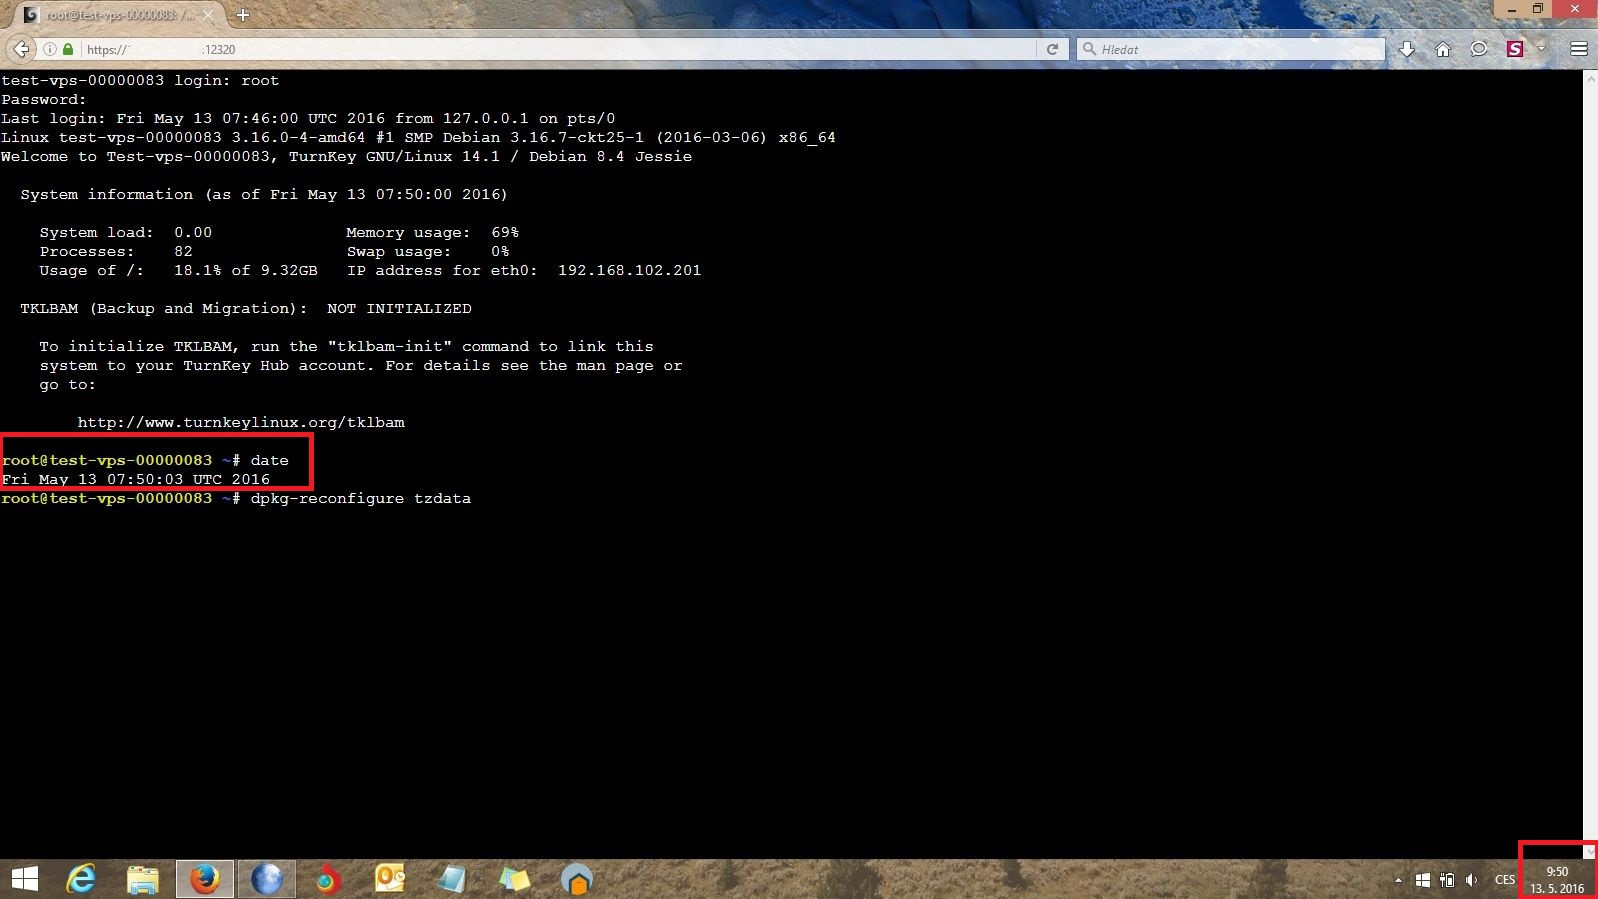
As stated in the description of the core TurnKey Linux image, all the TKL images contain the ntp tool for server time synchronization. After starting the machine with the TKL image, you can surely notice, that the time of the server is 2 hours behind the Central European Time. The reason for this is not failure of ntp, but the time zone which set on the server, that is UTC (Coordinated Universal Time). Should this time not be convenient for you, you can easily change the setting of the time zone.
- We connect and log in to the server (e. g. via the console available from within the customer portal or via putty client).
- Using the date command, we verify the current time on the server and the time settings
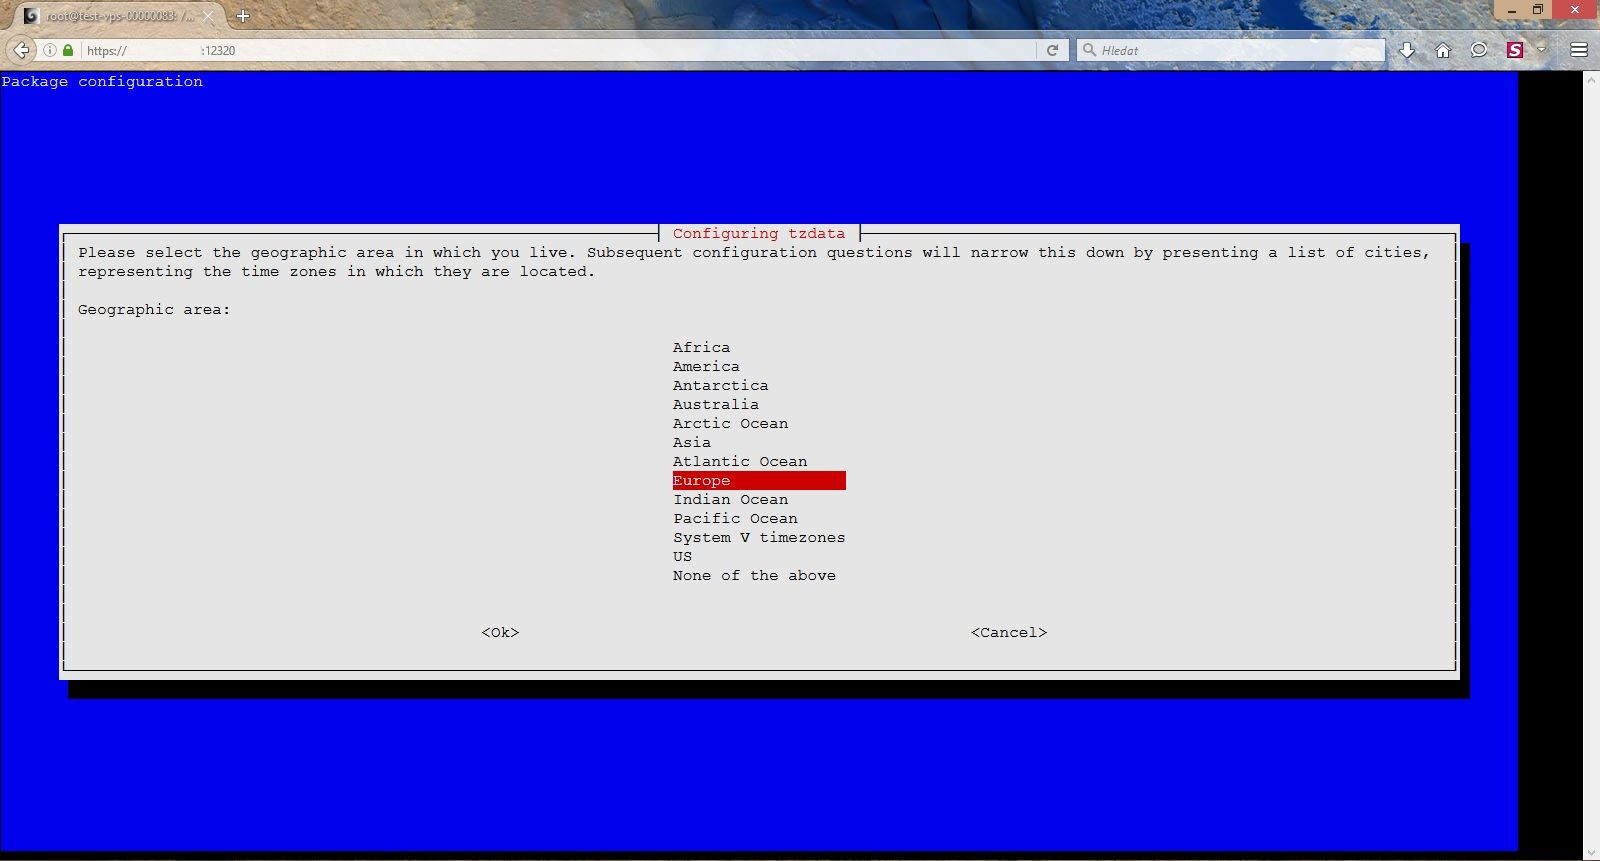
- If the time zone is set to UTC and it is not convenient for us, we enter the dpkg-reconfigure tzdata command
- The time zone settings dialog will appear and we will first choose the geographic area (Europe) and secondly the city, or more precisely the time zone (Prague)
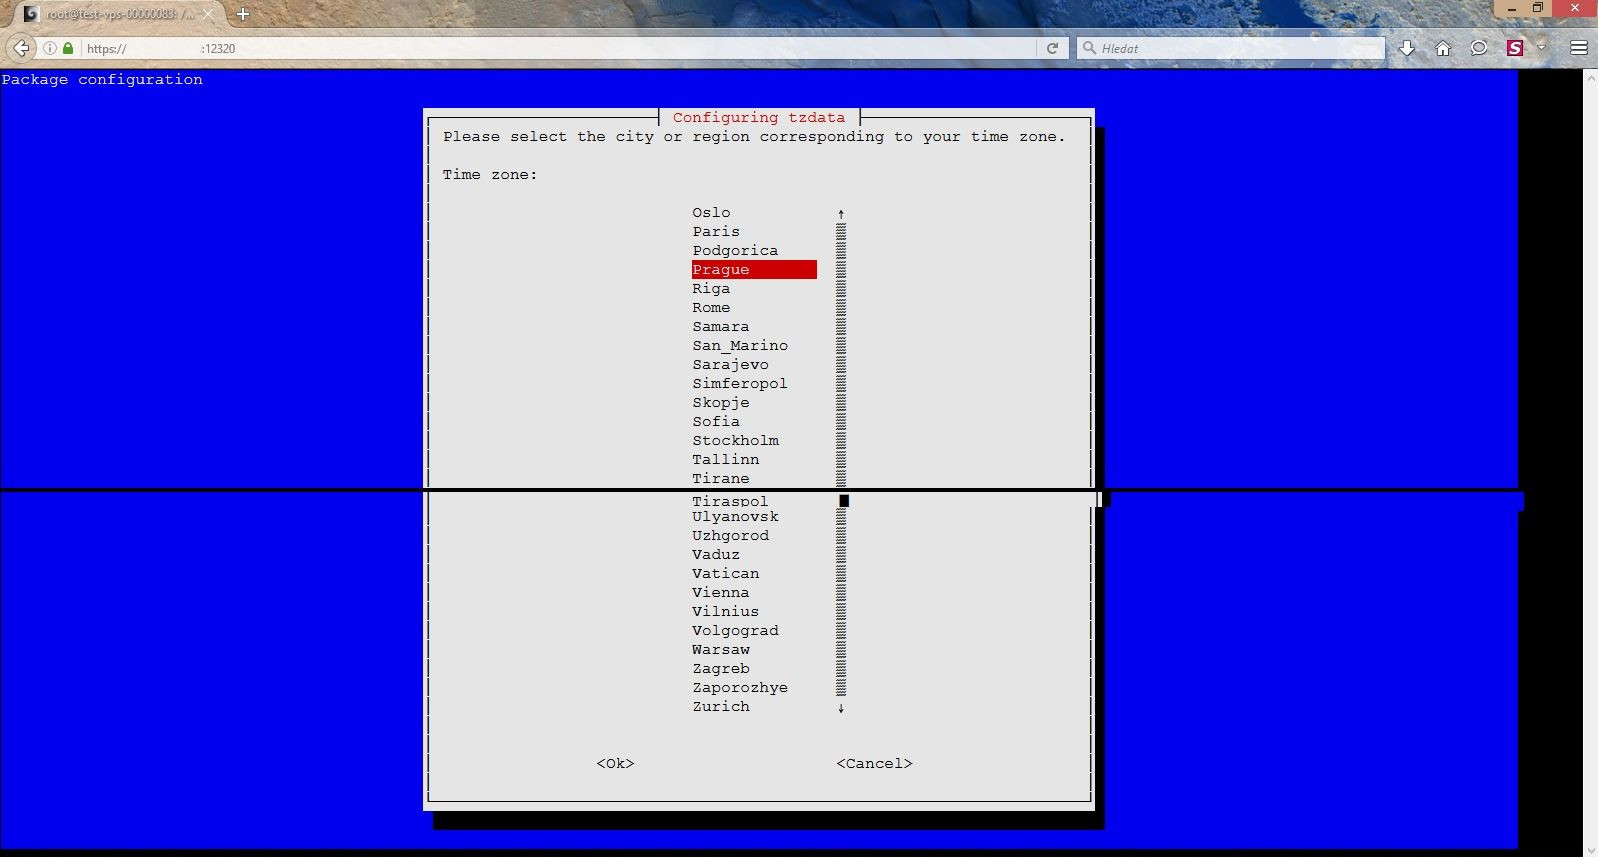
- We then confirm the changes made and these will be saved. Now we can use the date command once again in order to verify that the changes made to the time zone took effect and that the desired time is now set on the server

Notice: Should the time on the server, after the successful changing of the time zone settings, not match the time of the local machine (provided that there is the identical time zone set on both of the machines) from which you connect to the remote VPS, the invalid settings of the time on the local machine may be to blame.